Cooking Recipe For All

Get all Item Recipes is Here

Breaking

Showing posts with label side dish. Show all posts

Monday, August 7, 2017

August 07, 2017

Cheesy Tomato Biscuit Casserole


I don't know about you but I get in such a rut with side dishes. Most of the time it's because I'm feeling uninspired or lazy and the same old same old is easy to throw together. I'm happy to report that I branched out this weekend and now I have a new, amazing side dish to add to my repertoire. And, bonus, it reheats well (if you have any leftovers that is).
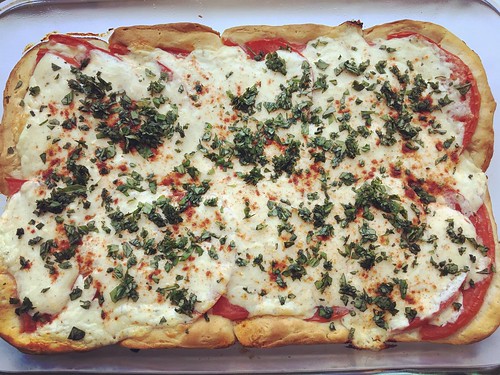
Cheesy tomato biscuit casserole

My friend Amy posted this Cheesy Tomato Biscuit Casserole months ago, but I've been waiting until the height of tomato season to make it. While you can get tomatoes year-round, the ones we're enjoying right now are insane. I don't know if it's just a good year for tomatoes or what, but damn. I feel like I need to eat. all. the. tomatoes. every. day. So, so good.

As I was typing up this post I realized I forgot the onion in the original recipe. Oops! Since we thought it was amazing without it - and, bonus, if you skip that step you have one less pan to clean - I'm leaving it out. I also opted to add fresh chopped basil once this came out of the oven, mainly because my basil plant is out of control right now and because tomatoes and basil are so good together. Totally your call. Also, use way more tomato than you think you need. Tomatoes have a lot of water in them so they'll shrink as they cook.

Hurry up and make this simple and delicious side dish now. You won't be sorry!

Cheesy Tomato Biscuit Casserole
Slightly modified from BellyFull

1/2 cup sour cream
1/4 cup mayonnaise
1 cup shredded cheddar cheese
1/4 teaspoon kosher salt
1/4 teaspoon pepper
1/4 teaspoon dried oregano
1/4 teaspoon garlic powder
1 container (16 ounce) Pillsbury Grands Buttermilk Biscuits
4 tomatoes, cut into 1/4-inch slices
paprika
fresh basil, chopped (optional)

Preheat the oven to 400 degrees. Coat a 9x13 casserole dish with nonstick cooking spray.

Combine the sour cream, mayonnaise, cheese, salt, pepper, oregano and garlic powder in a small bowl. Set aside.

Press the biscuits into the casserole dish, pinching the seams together so they cover the bottom of the pan and pushing the dough slightly up the sides. The dough will be thin.

Arrange the tomato slices on top of the biscuits, overlapping to fit as many slices as you can. Spread the cheese mixture over the top then sprinkle with a little paprika.

Bake for 25-27 minutes until the dough is cooked through and the cheese mixture is browning and bubbly. Let stand for 10 minutes, then top with chopped basil and cut into slices.

To reheat leftovers: Preheat a toaster oven to 350 degrees. Spray some foil with non-stick cooking spray and place a slice of the casserole on top. Heat in the toaster oven, being careful not to burn the edges of the crust, for about 5-10 minutes depending on your toaster.

Wednesday, September 14, 2016

September 14, 2016

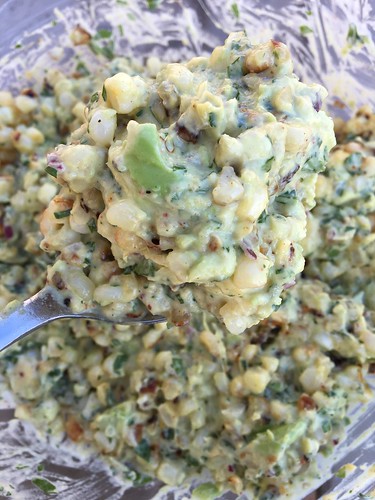
Warm Mexican Corn Salad {Esquites}

This is probably the fourth or fifth time I've made this Warm Mexican Corn Salad {Esquites} this summer, but I'm only just sharing it now because I never remembered to take a photo. Oops.

Esquites

This is my new go-to side dish whenever I make tacos and for good reason - it's a very simple recipe to make. The hardest part is getting all that darn silk off the corn cobs (I HATE that stuff - so annoying). I've been using fresh corn, but I imagine frozen would work, too. We're getting to the tail end of corn season here in PA, so I'm sure I'll find out soon enough.

I made quite a few changes and omissions to the original recipe to fit our preferences and to use what I had on hand the first time made this. This is one of those side dishes we can't stop eating and always end up fighting over the leftovers. This is enough for the three of us, which means if I ever decide to share I'll need to double or even triple the recipe.

Warm Mexican Corn Salad {Esquites}
Adapted from The Barbee Housewife

2 tablespoons butter
3 cups corn, cut from the cob {about 4 ears}
3 tablespoons mayonnaise
3 tablespoons minced red onion
handful of cilantro, chopped
Juice of 1 lemon
Chili powder, to taste
1 avocado, removed from the peel and diced
salt and pepper, to taste

Melt the butter in a non-stick skillet over medium-high heat. Add the corn. Let it sit, without stirring, so the corn starts to brown. Stir every so often until the corn is brown in spots, about 6-10 minutes.

Let the corn cool slightly, then add it to a bowl along with the mayonnaise, red onion, cilantro, lemon juice, and chili powder. Gently stir in the avocado, then season to taste with salt and pepper.

Serve warm or keep refrigerated until ready to eat.

Tuesday, September 13, 2016

September 13, 2016

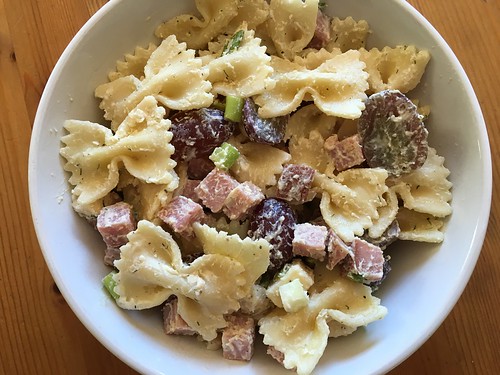
Crazy (but delicious) Pasta Salad

I'll warn you now - the ingredients in this pasta salad are WEIRD.

Pasta salad

I'm always up for trying new things, but when I ran this one by Steve he looked at me like I had three heads. I suggested we try it out for Sunday dinner with my parents (they're such troopers, always being my tasters for new recipes). And then I remembered I had an appointment early Sunday morning so he'd be the one actually making it. I figured it was easy - the only cooking you have to do is boiling the pasta - and it would be a chance for Katie to help out in the kitchen. They were just getting started mixing up the sauce when I left and by the time I got home the salad was done and chilling in the fridge. And Steve admitted it was delicious.

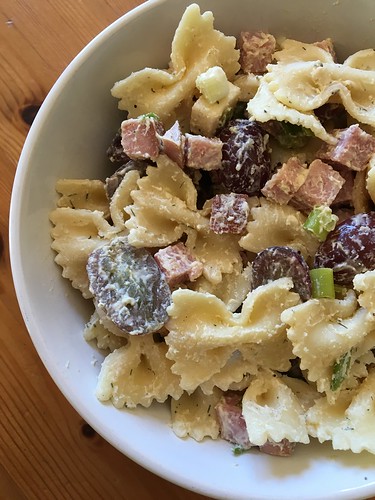
Pasta salad

Later, when we served it to my parents, we all kept going back for another spoonful. I won't pretend to know why but trust me, it works. And it couldn't be simpler. This is definitely one of those side dishes I'm going to make again and again.

Allison's Best Pasta Salad
As seen on Taste and Tell

2 cups dry farfalle (bowtie) pasta
1/2 cup mayonnaise
1/2 cup sour cream or plain Greek yogurt
2 tablespoons cider vinegar
1 1/2 tablespoons Dijon mustard
1 teaspoon granulated sugar
1/2 teaspoon ground black pepper
1/4 teaspoon dried dill
1/4 teaspoon salt
2 cups diced, cooked ham
1 1/2 cups red grapes, halved
6 oz sharp cheddar cheese, cubed
1/2 cup sliced green onions

Cook the pasta according to package directions. Drain and reserve.

While the pasta is cooking, stir together the mayonnaise, sour cream/Greek yogurt, cider vinegar, mustard, sugar, pepper, dill and salt in a small bowl.

Once the pasta is finished cooking, combine the drained pasta, ham, grapes, cheese and green onions. Pour the dressing over the top and stir to coat. Cover and chill for at least 6 hours, preferably overnight.

Monday, August 15, 2016

August 15, 2016

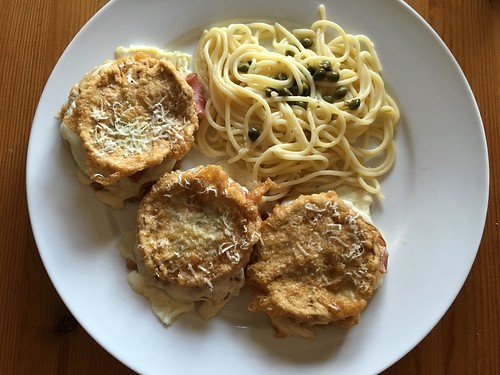
Pasta with Garlic Butter Caper Sauce

Sometimes I feel like this guy:


I really haven't been doing a good job as a blogger lately and I'm sorry for that. But like the meme promises, if you DO see a post from me it means I've made something so delicious I simply have to dust off my computer and type up a post.

Take this meal for instance. Today I'm sharing the side dish - Pasta with Garlic Butter Caper Sauce. Tomorrow you get the real star - Eggplant, Prosciutto and Mozzarella Stacks. But don't think for one second that the pasta isn't delicious in its own right.

Eggplant garlic caper pasta

I was a little sad that I only made 6oz of pasta because I could have eaten a whole pound myself. It's light yet flavorful and so, so simple. I simplified it even further by cooking everything in one pot. And I left out the wine because all I had was Riesling. We didn't miss it so I probably won't bother with it next time. And there will most certainly be a next time since this is now Steve's favorite meal of all time.

And hey, don't forget to come back tomorrow for those delicious eggplant stacks.

Pasta with Garlic Butter Caper Sauce
As seen on Iowa Girls Eats

6oz spaghetti
2 tablespoons butter, divided
4 garlic cloves, minced
1 1/4 cup chicken broth
2 tablespoons capers, rinsed
juice of 1 small lemon

Cook the spaghetti according to package directions. Drain well and set aside.

In the now-empty pot, melt 1 tablespoon of the butter over medium-high heat. Add the garlic and saute until just starting to brown. Add the chicken broth, lemon juice, and capers then turn heat up to high. Simmer until the sauce is reduced by half. Add the remaining 1 tablespoon butter. Taste and add salt, only if necessary.

Turn off the heat and add the cooked pasta to the pot. Toss to combine, then let sit for 3-4 minutes so the pasta can absorb some of the sauce.

Thursday, June 9, 2016

June 09, 2016

Bacon, Parmesan & Arugula Potato Salad

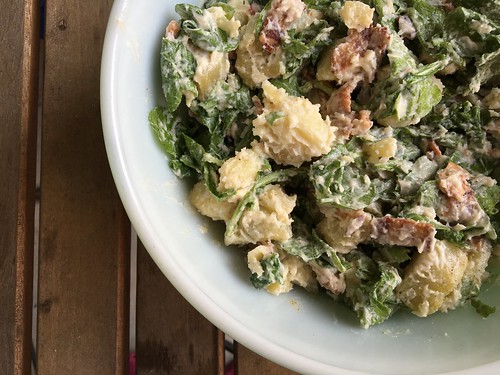
Sometimes the best things come into your life when you least expect them. Take this Bacon, Parmesan & Arugula Potato Salad. I wasn't looking for a new potato salad recipe, but as soon as I saw Kylee's post I just had to make it. And I'm really glad I did because we all absolutely loved it.

Potato salad with bacon arugula parm

I halved the recipe (the full amounts are listed below) and it was more than enough for the three of us. I brought the leftovers on a picnic the following day to share with friends and they raved, too. The best part is, it's super easy and incredibly flavorful.

Bacon, Parmesan & Arugula Potato Salad
Slightly modified from Kylee Cooks

3 lbs Yukon gold potatoes, peeled and cubed
1 teaspoon salt
1 lb bacon
1 5-oz bag arugula
mayonnaise
Shaved or grated Parmesan or Pecorino cheese
Freshly ground black pepper

Place potatoes in a large pot of cold water covering them by 1-inch. Bring to a boil over high heat and add salt. Reduce heat to medium-low and simmer for 10 minutes, until the potatoes are tender. Don't overcook them or they'll get mushy!

Meanwhile, cut the bacon into pieces using kitchen scissors. Cook it in a pan until crispy, then drain on a paper towel. Reserve the bacon grease in the pan.

Once the potatoes have cooked, drain them and immediately toss with the reserved bacon fat. Drain again and spread out on rimmed baking sheet. Refrigerate until cooled, about 30 minutes.

Mix the cooled potatoes, bacon, arugula, mayonnaise, Parmesan, and pepper together. Taste and adjust seasonings and mayo as needed.


Wednesday, February 24, 2016

February 24, 2016

Spinach Salad with Strawberries and Bacon

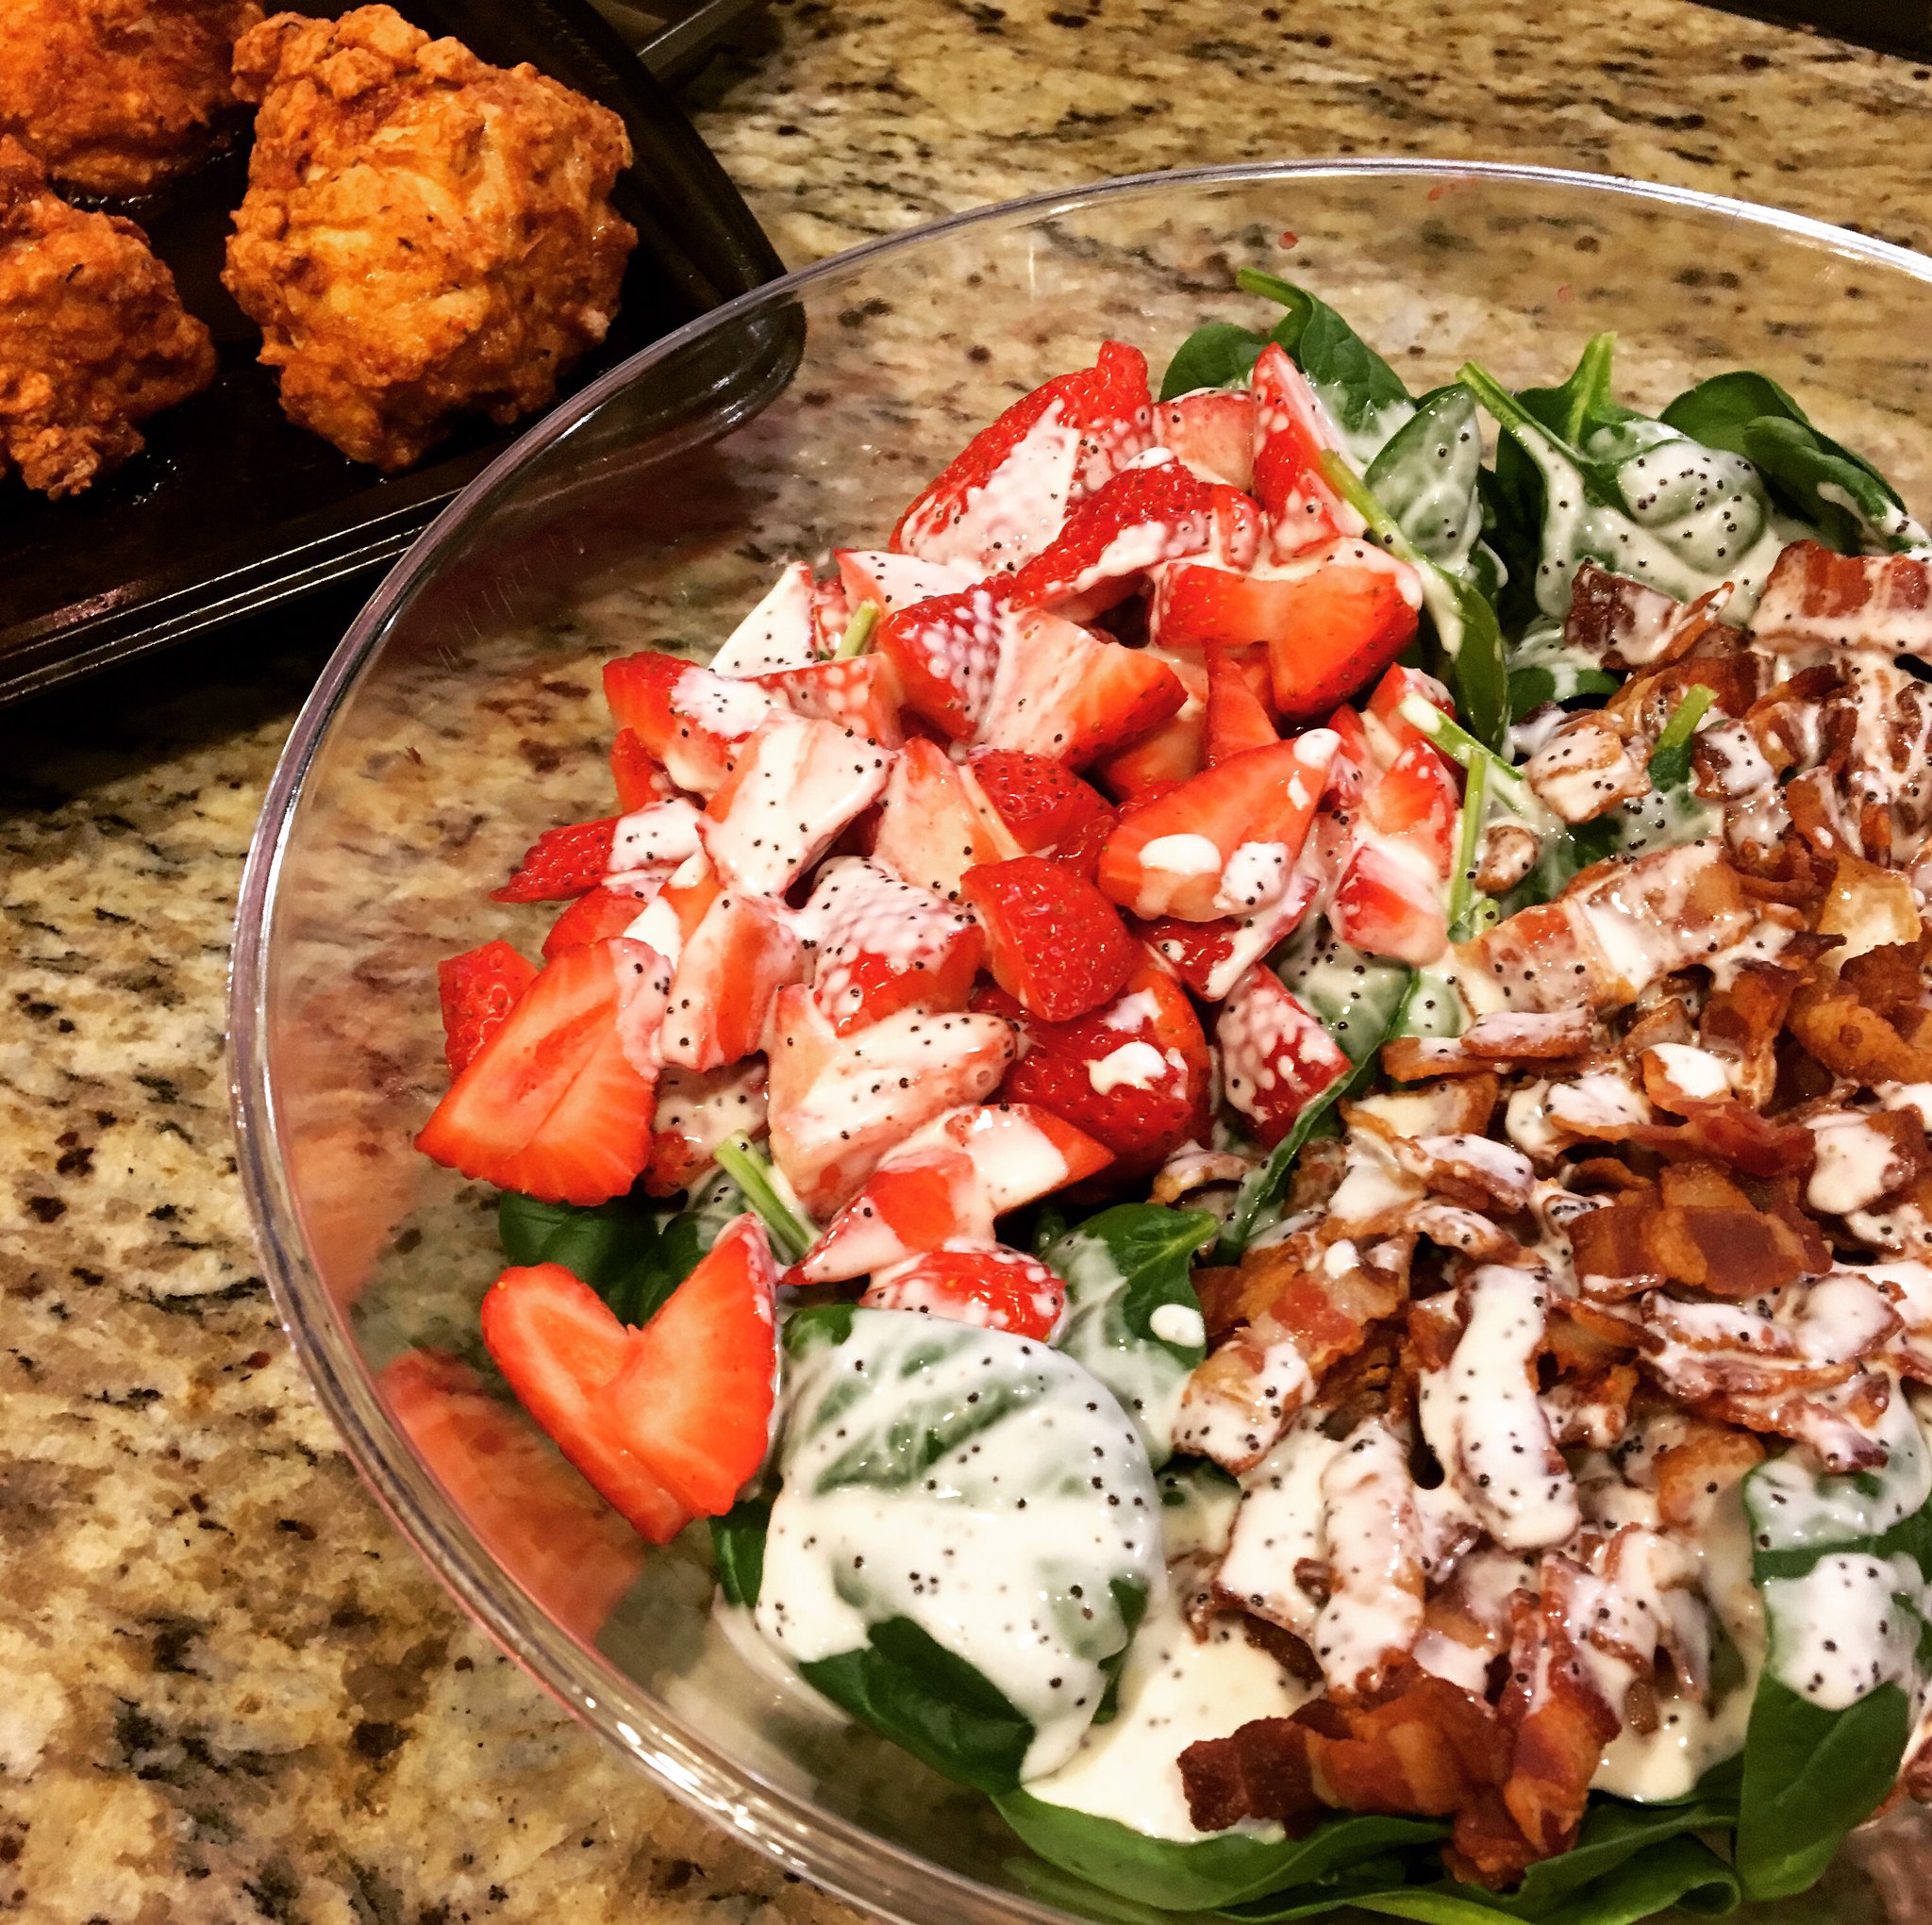
A few weeks ago I was looking for a light, fresh salad to bring to a friend's house for one of our semi-regular cooking extravaganzas. I knew my friend, Jaida, would have something delicious on her blog and I was right. As soon as I saw this Spinach Salad with Strawberries and Bacon I knew I had a winner.

Spinach salad

I left out the toasted almonds due to Katie's nut allergy and decreased the amount of sugar in the dressing because we prefer things tangy, but otherwise I didn't change a thing. I've made this twice now and both times it was a sleeper hit. People don't seem to expect much from such a simple salad, but the flavors are so light and delicious. I know I'll be making this one often this spring and summer.

Pro tip: I like to cut bacon with kitchen shears. Simply remove however many slices you need from the package, keeping them stuck together, and cut them in half. Hold the chunk o' bacon over the skillet and snip pieces off directly into the pan. Repeat with the other half. No muss, no fuss.

Spinach Salad with Strawberries and Bacon
As seen on Sweet Beginnings, originally from Lauren's Latest

8 slices bacon, chopped
1 6oz bag baby spinach
2 cups sliced fresh strawberries
1/4 cup toasted almonds, chopped (I left these out due to Katie's allergy)
1/2 cup Greek yogurt
1/2 cup mayonnaise
1/4 cup white vinegar
2 tablespoons sugar
salt & pepper, to taste
1 teaspoon poppy seeds

In a large skillet, cook the bacon pieces over medium heat, until just crisp. Remove to a paper towel-lined plate to drain.

Place the spinach in a large bowl and top with the strawberry slices, almonds and bacon.

Combine the yogurt, mayonnaise, vinegar, sugar, salt and pepper, and poppy seeds in a small bowl and whisk until smooth. Drizzle the dressing over the salad just before serving.

All the components can be prepped a few days ahead of time and stored separately in the fridge.

Tuesday, September 8, 2015

September 08, 2015

Caprese Salad with Warm Bacon Dressing

Raise your hand if you're mourning the end of summer. I know I am. I love everything about summer - the warmth, the sun setting later, the pool, the beach, kids playing in the backyard before bed. I'm not one of those people who looks forward to fall with its cooler temps, sweaters and boots. Give me t-shirts and flip flops any day.

But, alas, summer is winding down. The good news is, this is the time when Jersey tomatoes are still at their best and there's no better way to showcase them than in caprese salad. I'm not usually one to mess with perfection. Caprese, with its creamy fresh mozzarella and red ripe tomatoes sprinkled with basil is my idea of a perfect summer meal. I love to eat it plain or tossed with pasta.

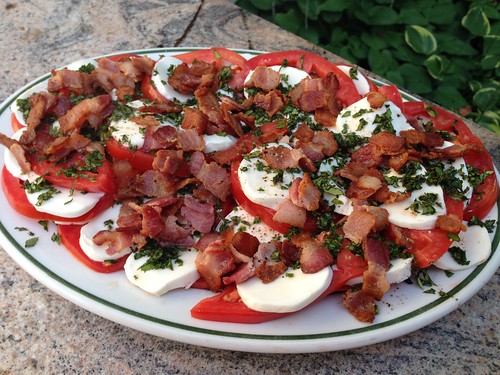
Caprese with warm bacon dressing

Then I saw this recipe for Caprese Salad with Warm Bacon Dressing. I was skeptical at first. Bacon on caprese? With red wine vinegar? Admittedly, I'm not a fan of balsamic on caprese, so I was hesitant to try this. But I'm so glad I did. We had this with my parents for Labor Day dinner and we were fighting over it. The crispy bacon is the perfect contrast to the mozzarella and tomatoes and the warm dressing, with just the right amount of tang from the red wine vinegar, is addictive.

Caprese Salad with Warm Bacon Dressing
As seen on Fake Ginger, adapted from Southern Living

2 1/2 pound beefsteak tomatoes, cut into 1/2-inch slices
8 ounces fresh mozzarella, cut into 1/2-inch slices
1/2 cup fresh basil leaves, finely minced
6 thick bacon slices, chopped into bite-size pieces
2 tablespoons red wine vinegar
1/2 teaspoon salt
1/2 teaspoon pepper

Arrange the tomatoes and mozzarella on a serving platter. Sprinkle with the minced basil.

Saute the bacon pieces in a large skillet over medium heat until crisp. Remove the bacon pieces to a paper towel-lined plate. Transfer 2 tablespoons of the bacon fat to a small bowl. Let stand for 1 minute, then whisk in the vinegar, salt, and pepper. Add the bacon pieces to the dressing and stir to combine. Drizzle the dressing over the salad right before serving.

Thursday, July 23, 2015

July 23, 2015

Grilled Ciabatta Bread Salad

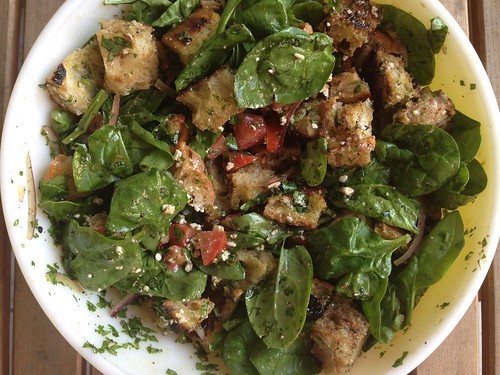
My friend Mary Ellen made this Grilled Ciabatta Bread Salad for us twice before I finally got off my butt and made it myself. It's one of SP's favorite salads so he's been bugging me to make it.

Grilled bread salad

We have a charcoal grill, which makes it harder to control the heat of the fire. My bread got pretty blackened so I had to cut some sections off (I really dislike overly charred food), but that was no big deal. This made a TON of salad, way more than the three of us could eat, so next time I'll cut the recipe in half or just make it when we have company.

Grilled Ciabatta Bread Salad
As seen on Mary Ellen's Cooking Creations

1/2 small red onion, thinly sliced
1 small bunch cilantro, chopped
1 cup good olive oil, divided
1 loaf ciabatta bread
1 6-oz bag baby spinach
2 tomatoes, chopped
blue cheese or feta crumbles, to taste

1/2 cup balsamic vinegar
Salt, pepper and oregano, to taste

Place onions, cilantro and 1/2 cup olive oil in a large bowl and toss together. Let marinate in the fridge while you grill the bread.

Slice the bread into two long halves. Spray or brush with cooking spray/olive oil, season with salt and pepper and grill until charred on both sides.

Let the bread rest until it's cool enough to handle, then chop into 1 inch pieces. Add bread cubes to the onion and cilantro mixture, along with the remaining 1/2 cup olive oil. Chill at least 30 minutes.

Before serving, add the tomatoes, spinach and cheese. Toss with the balsamic (start slowly and add to taste), salt, pepper and oregano to taste. Serve immediately

Monday, July 6, 2015

July 06, 2015

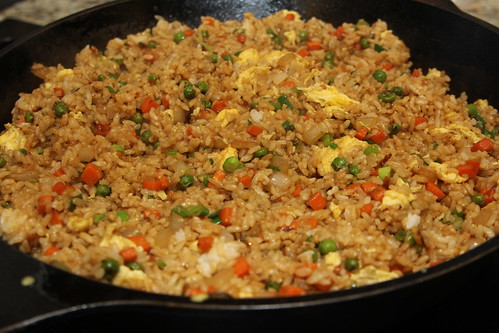
Fried Rice

One of T's contributions to our Asian dinner was Fried Rice. But in true form, she managed to be busy when it was time to cook the rice so the task fell to me. I pick on her about this all the time, her knack for finding something else to do when I'm in her kitchen so she's off the hook for cooking. I actually don't mind - I love cooking in her kitchen. There's so much room!

Asian night
(all photos by T. Casey)

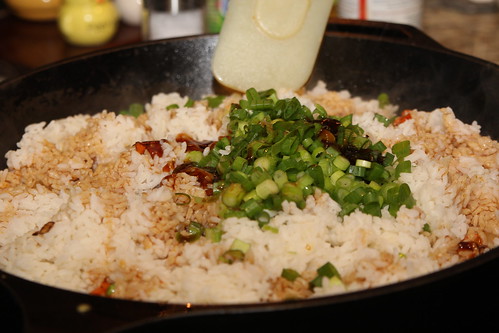
Anyway, let's talk about this fried rice. T did all the prep the day before (a must when making fried rice - the rice needs to be pre-cooked and cold) so all I had to do was throw it all together in her huge cast-iron skillet.

Asian night

This was outstanding. So fresh and flavorful. T doubled the recipe for our dinner and it was enough to feed 6 adults, 2 kids plus two of T's adult kids who scrounged the kitchen for leftovers after we'd eaten.

Fried Rice
As seen on Gimme Some Oven

3 tablespoons butter, divided
2 eggs, beaten
2 medium carrots, peeled and diced
1 small white onion, diced
1/2 cup frozen peas
3 cloves garlic, minced
salt and pepper
4 cups cooked and chilled short-grain white rice
3 green onions, thinly sliced
3-4 tablespoons soy sauce, or more to taste
2 teaspoons oyster sauce
1/2 teaspoon toasted sesame oil

Heat 1/2 tablespoon of butter in a large skillet over medium-high heat until melted. Add the beaten egg, and cook until scrambled, stirring occasionally. Remove egg to a separate plate.

Add an additional 1 tablespoon butter to the pan and heat until melted. Add carrots, onion, peas and garlic, and season with a generous pinch of salt and pepper. Saute for about 5 minutes or until the onion and carrots are soft.

Increase heat to high, add in the remaining 1 1/2 tablespoons of butter, and stir until melted. Immediately add the rice, green onions, soy sauce and oyster sauce and stir until combined. Continue stirring for an additional 3 minutes to fry the rice. Then add in the eggs and stir to combine. Add the sesame oil, stir to combine, and remove from heat.

Serve warm.

Thursday, June 25, 2015

June 25, 2015

Quick Stir-Fried Snow Peas or Sugar Snap Peas

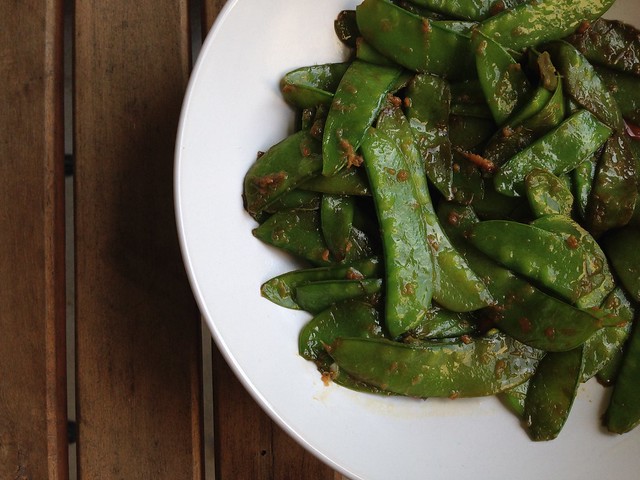
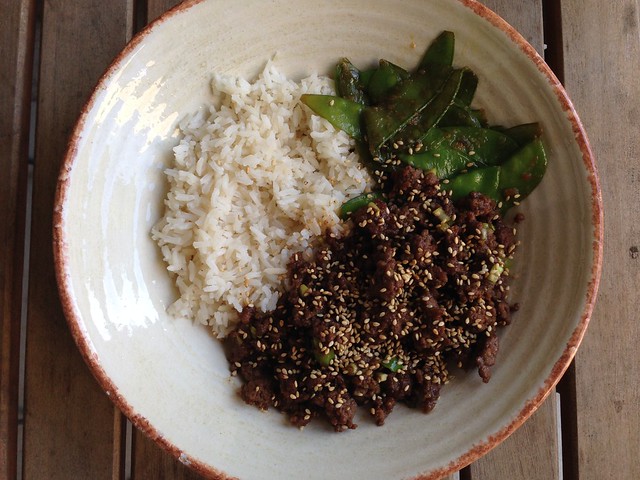
Baby Girl loves snow peas. Usually she eats them raw but I wanted to try cooking them as a side dish for dinner one night. After a quick Google search I found this recipe for Quick Stir-Fried Snow Peas or Sugar Snap Peas. The ingredients closely mirrored my main dish (a family favorite - Cheater Korean Beef) so I thought it would be perfect

Snow peas

Sadly, I overcooked the snow peas, but they were still tasty. Baby Girl told me she loved the flavor but wished they were still crispy like when she eats them raw. Next time (and there will definitely be a next time) I won't let them go too far.

Snow peas

Quick Stir-Fried Snow Peas or Sugar Snap Peas
As seen on Diner's Journal from the NY Times

2 tablespoons canola, vegetable or peanut oil
1 1/2 pounds snow or sugar snap peas, washed and trimmed
1 tablespoon minced ginger
1 tablespoon minced garlic
1 teaspoon dark sesame oil
1 to 2 tablespoons soy sauce

Place 2 tablespoons oil in a large, deep skillet or wok and turn heat to high. When it begins to smoke, toss in peas and cook, stirring almost constantly, until they are glossy, bright green and begin to show a few brown spots, about 5 minutes.

When peas are almost done, stir in ginger and garlic, and cook another minute or so. Turn off heat and remove peas to a platter. Drizzle with dark sesame oil and soy sauce. Taste and adjust seasoning, and serve.

Friday, May 1, 2015

May 01, 2015

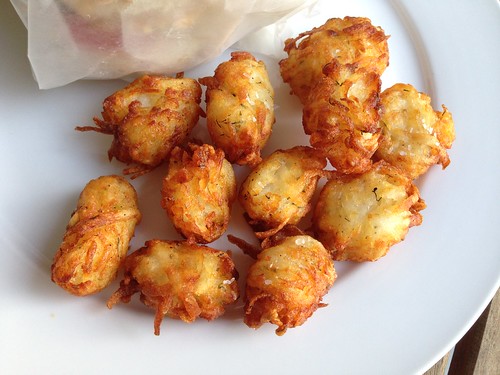
Homemade Tater Tots

Sometimes I see a recipe and I have to make it right away. That was the case with these Homemade Tater Tots. I was reading my blog feed on a Friday afternoon and came across this recipe. Baby Girl doesn't like tater tots, (for some reason she isn't a fan of most potato dishes) but she was going to my parent's house for a sleepover that night. Score! I immediately went into my kitchen to see what kind of potatoes I had. Unfortunately I only had red potatoes, but I forged ahead anyway.

Tater tots

Red potatoes have less starch and more sugar, so they're drier and stickier than a russet. I had a heck of a time forming these into tots, but I persevered with a bowl of water to rinse my hands. I can't wait to make these again, but with a russet instead. They're starchy and light, which makes them perfect for frying. Even so, these were really good. SP loved them. Now if only we could get Baby Girl to like them...

Homemade Tater Tots
As seen on Damn Delicious

2 pounds russet potatoes, peeled
1 tablespoon all-purpose flour
1 teaspoon garlic powder
1/2 teaspoon onion powder
1/4 teaspoon dried oregano
1/4 teaspoon dried dill
Kosher salt and freshly ground black pepper, to taste
1 cup vegetable oil

Place potatoes in a large saucepan and cover with cold water by 1 inch. Bring to a boil and cook until parboiled, about 6-7 minutes; drain well and let cool.

Using a box grater, finely shred potatoes. Using a clean dish towel or cheese cloth, drain potatoes completely, removing as much water as possible.

Transfer potatoes to a large bowl. Stir in flour, garlic powder, onion powder, oregano and dill; season with salt and pepper, to taste. The mixture should be workable but dry. Form potatoes into tots.

Heat vegetable oil in a large stockpot or Dutch oven over medium heat. Add tots (don't crowd the pan) and cook until evenly golden and crispy, about 3-4 minutes. Transfer to a paper towel-lined plate. Sprinkle with some more salt and then serve immediately.*

*TO FREEZE: Transfer cooled tater tots to an airtight container. Freeze up to 1 month. To bake, preheat oven to 400 and bake until heated through, about 15-17 minutes.

Wednesday, February 11, 2015

February 11, 2015

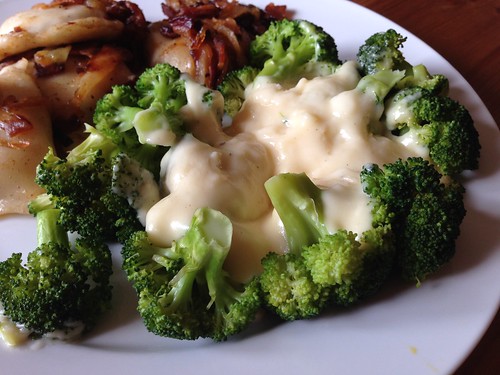
Easy Cheddar Cheese Sauce for Vegetables

We all love pierogies but it had been ages since I'd served them for dinner. I always serve them with bacon and caramelized onions, with a big dollop of sour cream. And I always serve steamed broccoli on the side. This time I wanted to do something a little different with the broccoli. Enter this Easy Cheddar Cheese Sauce for Vegetables.

Easy cheese sauce

This is the same sauce you'd make for mac and cheese. It's an easy sauce to make and was really good with the steamed broccoli. I thought the original recipe was a bit thick, so I've halved the butter and flour in the recipe below.

Easy Cheddar Cheese Sauce for Vegetables
As seen on Iowa Girl Eats

1 tablespoon butter
1 tablespoons flour
salt and pepper
1 cup milk
1-1/2 cups freshly shredded cheddar cheese

Melt butter in a saucepan over medium heat. Add flour and whisk for one minute.

Slowly whisk in milk then season with salt and pepper and switch to a wooden spoon. Stir and cook until thickened, about 4-5 minutes.

Turn off heat and add cheese. Stir until melted and smooth. Taste then season with additional salt and pepper if necessary. Serve immediately.

Wednesday, November 26, 2014

November 26, 2014

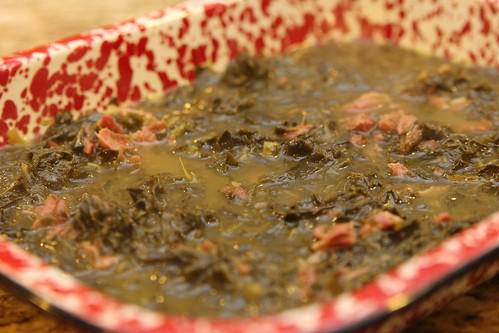
Collard Greens

I love collard greens but the last time I tried to make them they were inedible. So. Much. Salt. I vowed to try again for our Southern night redo. This time I pretty much eliminated the salt from the recipe and I nailed it!


These were perfect with fried chicken, mac and cheese and cornbread. It takes some time to prep the collard greens but since you have to boil the water for an hour that's the perfect time to get it done. These were just as good as the ones we get from our favorite BBQ spot - a little spicy and so flavorful.

Collard Greens
Modified from Paula Deen

1 smoked ham hock
1 tablespoon seasoned salt
1/4 teaspoon black pepper
1/2 teaspoon garlic powder
a few dashes Tabasco sauce
1 large bunch collard greens
1 tablespoon butter

In a large pot, bring 3 quarts of water to a boil. Add the ham hock, seasoned salt, black pepper, garlic powder and hot sauce. Reduce heat to medium and cook for 1 hour.

While the water is boiling, wash the collard greens thoroughly. Remove the stems that run down the center by holding the leaf in one hand and stripping the leaf down with your other hand. The tender young leaves in the heart of the collards don't need to be stripped.

Once all the leaves have been washed and dried, stack 6 to 8 leaves on top of one another, roll them up, and slice into 1/2 to 1-inch thick slices.

After the water cooks for an hour, put the greens in the pot and add the butter. Cook for 45 to 60 minutes, stirring occasionally. Taste and adjust the seasoning, if needed. If you want, you can remove the ham hock, allow to cool and pick the meat off the bone. Add the meat to the collard greens and stir to combine before serving.

Wednesday, October 29, 2014

October 29, 2014

Recipe Redo: Crash Hot Potatoes

These crash hot potatoes were all the rage back in 2008. Like most food bloggers, I made them a few times and then they fell off my radar.

Crash hot potatoes

Recently, I was looking for a side dish to go with burgers. I had planned to make potato salad, but the day got away from me. Normally I'd go with my standby roasted potatoes, but we were out of red potatoes. It was late afternoon and I had no clue what to make with my basket full of Yukon golds. I Googled Yukon gold potatoes and side dish and while these potatoes didn't come up in the initial search, something I clicked on reminded me of them and off I went.

Baby Girl, being the insane child she is, doesn't like potatoes. She took a tiny nibble and then said "no thank you." She won't eat French fries, mashed potatoes, tater tots, home fries, etc. either. Weirdo. SP and I loved them. He was especially enamored of them, so much so that he insisted I make them again the following night. They do take a bit of planning ahead because you have to boil the potatoes whole, smash them and then bake them, but the hands-on time is minimal. I used fresh herbs from my garden (rosemary and thyme), which was the perfect combination. And I love that you can make as many as you want - I made four the first night and five the next and we ate the leftovers the next day, reheated in the toasted oven to try to bring back some of the crispiness.

Crash Hot Potatoes
As seen on The Pioneer Woman

Small Yukon gold potatoes (as many as you want to serve)
Olive oil
Kosher salt, to taste
Black pepper, to taste
Fresh rosemary and thyme, to taste

Scrub the potatoes well and place in a large pot. Try to choose potatoes that are roughly the same size so they'll all cook at the same rate. Cover the potatoes with cold water and add some salt. Place the lid on the pot and bring to a boil. Cook the potatoes for 20 minutes, or until they are fork-tender.

Drizzle some olive oil on a baking sheet and use a pastry brush to spread the oil evenly. Drain the potatoes and place them on the baking sheet, leaving plenty of room between each potato.

Using a potato masher, gently press down on each potato until it flattens. Brush the tops of each crushed potato with more olive oil. Sprinkle the potatoes with plenty of kosher salt, fresh ground black pepper and fresh chopped rosemary and thyme.

Bake in a 450 degree oven for 20-25 minutes until golden brown and crispy. Serve hot.

Monday, October 20, 2014

October 20, 2014

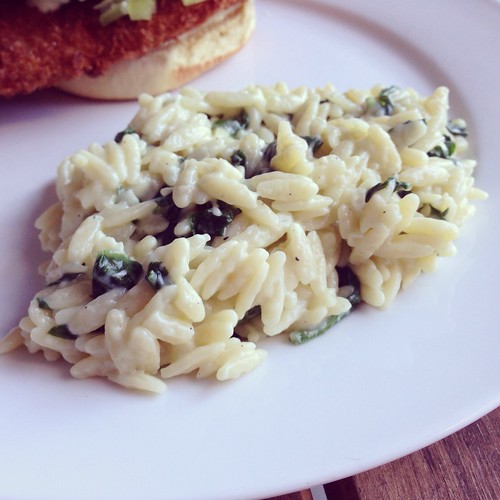
Spinach & Parmesan Orzo

::tap, tap, tap:: Is this thing on?

Sorry for disappearing there. I'm hoping some of you have stuck around despite the brief hiatus. I've been saying for months now that I've lost my blogging mojo and, well, it still hasn't returned. But I do have a few posts in my draft folder that I figured I should get published. I hope you guys will stick with me as I weather this (hopefully temporary) storm.

So...spinach and Parmesan orzo. I saw this one on my friend Kylee's blog and it looked like a great, simple side dish. Right up my alley these days.

Spinach parm orzo

As suspected, it was easy to make and we all loved it. Baby Girl kept calling it risotto, one of her all-time favorite cold weather meals. I'll definitely be making this one often.

Spinach & Parmesan Orzo
As seen on Kylee Cooks

8oz orzo pasta
1 tablespoon olive oil
2 garlic cloves, minced
1 tablespoon flour
1/2 cup milk
1 1/2 cups baby spinach, roughly chopped
1/2 cup parmesan cheese
Salt and pepper, to taste

Cook the orzo according to the package directions.

While the orzo is cooking, heat the olive oil in a saucepan. Add the garlic and cook just until it's fragrant.
Sprinkle the flour into the pot and stir to combine. Whisk in the milk, and continue to cook over low heat until thickened. Add salt and pepper to taste.

Once the orzo is cooked, drain it and add it to the sauce. Add the spinach and Parmesan. Stir gently to combine. Taste it and adjust the seasoning, as needed.

Wednesday, September 24, 2014

September 24, 2014

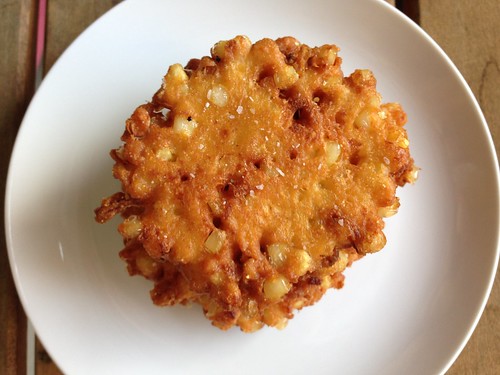
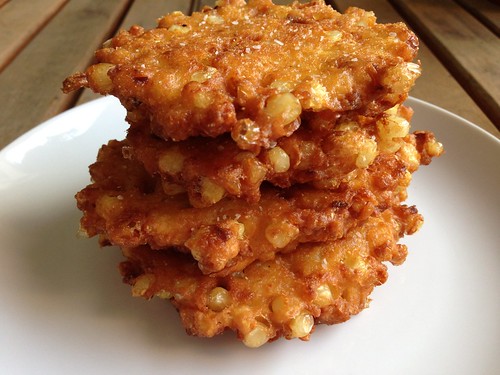
Recipe Remake: Farmstand Corn Fritters

I can't believe I've been making these corn fritters for 7 years already. They're so easy and the flavor is incredible. The last few times I've made them Baby Girl helped by stirring all the ingredients together in the bowl.

Corn fritters

My original post didn't even include a photo (what was I thinking?) and since that post was back in 2007 I figured it was time to bring it back from the archives while corn was still in season (although I'm cutting it a bit close). We usually eat them plain, but you could serve them with a dipping sauce or top them with mozzarella, tomato and basil. We rarely have leftovers but if you did, you could serve them with a fried egg the next morning.

Corn fritters

If you can still get farm-fresh corn you need to make these ASAP. I'm kicking myself for not putting corn on the shopping list this week.

Farmstand Corn Fritters
As seen in Cook's Country magazine Aug/Sept 2005

3-4 ears of corn, husks and silk removed
1 large egg, beaten lightly
3 tablespoons flour
3 tablespoons cornmeal
2 tablespoons half-and-half (can also use heavy cream)
1/2 small shallot, minced
1/2 teaspoon salt
1/2 cup corn or vegetable oil, as needed

Using a chef's knife, cut the kernels from 1 to 2 ears of corn (depending on size) and place in a large bowl. You should have about 1 cup of whole kernels. Grate the kernels from the remaining ears of corn on the large holes of a box grater. You should have a generous 1/2 cup of grated kernels. Add to the bowl with the whole kernels. Using the back of a butter knife, scrape any remaining pulp from all the cobs and put in the bowl. Stir in the egg, flour, cornmeal, cream, shallot, and salt.

Heat oil in a large heavy-bottomed non-stick skillet over medium-high heat until shimmering. Drop 6 heaping tablespoons of batter into the pan. Fry until golden brown, about 5 minutes per side. Leave them alone until you see them starting to brown around the edges, then carefully flip them over to cook on the second side.

Transfer fritters to a plate lined with paper towels. Sprinkle with some salt. Fry the remaining batter. Serve immediately.

Monday, July 14, 2014

July 14, 2014

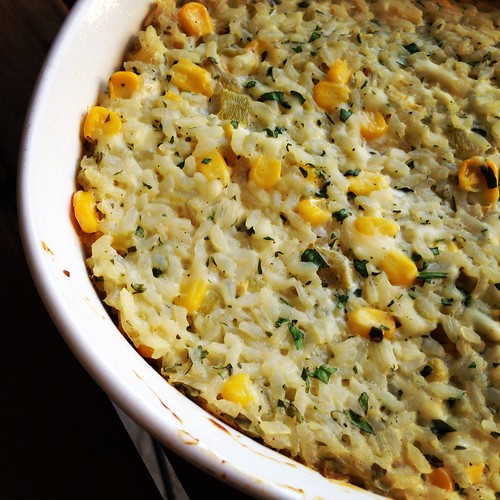
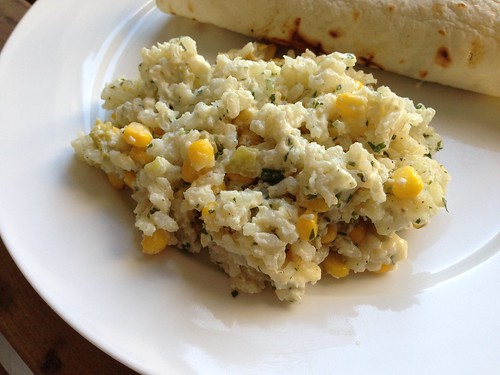
Recipe Redo: Mexican Sour Cream Rice

I've been making this Mexican Sour Cream Rice for years. I used to make it any time we had anything even slightly Mexican-inspired for dinner. It was definitely my go-to side dish.

Mexican sour cream rice

I've been recommending the dish to friends a lot recently and I figured it was time to update my blog with some better pictures. Please forgive those early blogging pics - I may not be a professional photographer but I think my photos have come a long way since then.

Mexican sour cream rice

The last time I made this I used regular Monterrey Jack cheese instead of pepper Jack because Baby Girl doesn't like spicy things. We both felt it lost a little something with the milder cheese so next time I'm going to throw caution to the wind and go back to pepper Jack. We don't remember it being super spicy that way so hopefully Baby Girl won't refuse to eat it.

Mexican Sour Cream Rice
Modified from All Recipes

1 3/4 cups chicken broth
1 cup uncooked long grain white rice
1 cup sour cream
1 (4 ounce) can diced green chile peppers
2 cups shredded Monterey or pepper Jack cheese
1 1/2 cups frozen corn
1/4 cup finely chopped fresh cilantro
salt and pepper to taste

Bring the chicken broth to a boil in a large sauce pot. Add the rice, stir and then reduce the heat to low. Cover and simmer for 20 minutes.

Meanwhile, preheat the oven to 350. Lightly grease a 1-1/2 quart casserole dish.

Add the sour cream, green chile peppers, cheese, corn, and cilantro to the pot with the rice. Stir to combine, then season with salt and pepper. Transfer to the greased casserole dish.

Bake uncovered for 30 minutes until the top is lightly browned.

Friday, June 20, 2014

June 20, 2014

Cooler Corn on the Cob

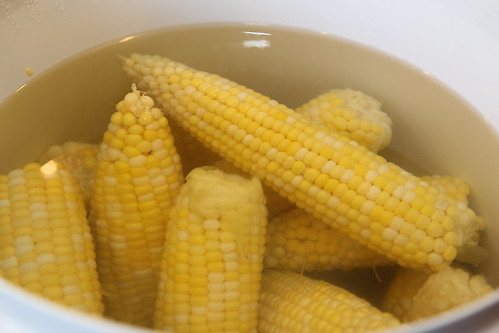
For our recent BBQ-themed dinner with C&T we had something I'd never heard of before - cooler corn on the cob. T had seen the idea on Pinterest when looking for camping meal ideas and figured it would be fun to try for our backyard BBQ. This would be awesome for parties - you can make a large amount of perfectly-cooked corn in no time flat and it keeps warm for hours.

Untitled
Photo credit - T. Casey

The "recipe" is not really a recipe, just a method, but I had to share it with you guys. I'm going to offer to bring cooler corn to the next BBQ we're invited to, just to try it out for myself.

Cooler Corn on the Cob

1 cooler (small or large depending on how much corn you're making)
Corn on the cob

Wash the cooler well. Shuck the corn, removing all the outer levels and silk. Place the shucked corn in the cooler.

Bring a large pot of water to a boil. Pour over the corn. You want to submerge the corn. Close the lid of the cooler and let it sit for at least 30 minutes.

The corn can sit in the cooler for a couple hours. When you're ready to eat, just drain off the water and enjoy.