Cooking Recipe For All

Get all Item Recipes is Here

Breaking

Wednesday, December 17, 2014

December 17, 2014

Chinese Green Beans with Pork

I think of my friend MaryEllen as the queen of stir fries. Pretty much any Asian stir fry on this blog came from her. This recipe for Chinese Green Beans with Pork is based on her recipe, but modified a bit based on what I had in my pantry and fridge.
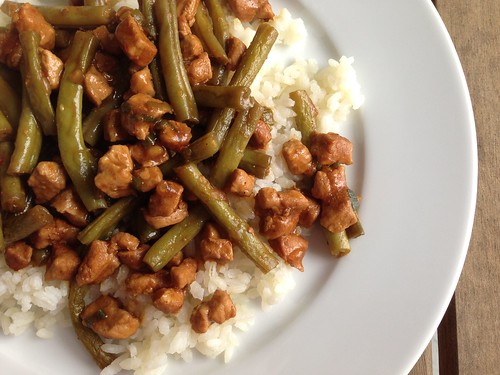

This was a great way to use up 2 lone pork chops I found in the freezer. Green beans have been hit or miss for us this year but this was a good batch. Simple, tasty, and quick - my idea of a great weeknight dinner.
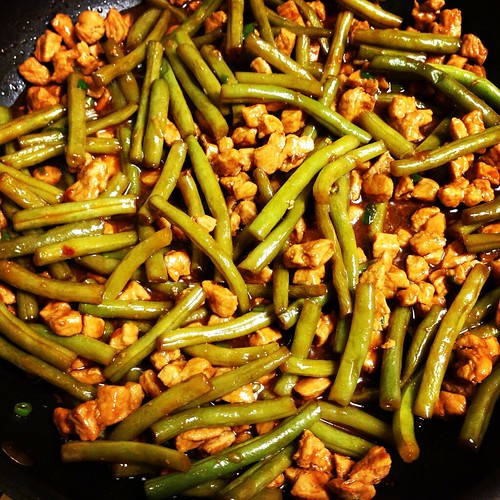


Chinese Green Beans with Pork
Modified from Mary Ellen’s Cooking Creations

1 tablespoon sesame oil
2 pork chops cut into very small pieces
1 lb washed and trimmed green beans
2 cloves garlic, minced
1 1/2 cups chicken stock
2 tablespoons cornstarch
2 tablespoons oyster or hoisin sauce
2 tablespoons soy sauce
1 heaping teaspoon chili garlic sauce
Freshly ground black pepper
1-inch piece fresh ginger, peeled and grated
2 tablespoons Shaohsing rice wine
1 small bunch scallions, sliced thin
white rice or spaghetti/angel hair, cooked, for serving

Heat a large skillet over high heat. Add the sesame oil then add the pork and sauté for 3-5 minutes until the meat is mostly cooked. Add the green beans and garlic and sauté 1 minute. Combine the stock, cornstarch, oyster or hoisin sauce, soy sauce, chili garlic sauce, pepper and grated ginger, then add to the skillet. Bring to a boil. Continue cooking over high heat for 7-9 minutes longer, stirring frequently, until beans are slightly tender but still have some crispiness to them.

Stir in the scallions and rice vinegar, and cook one minute longer. Serve over cooked rice or noodles.

Monday, December 15, 2014

December 15, 2014

Indonesian Ginger Chicken

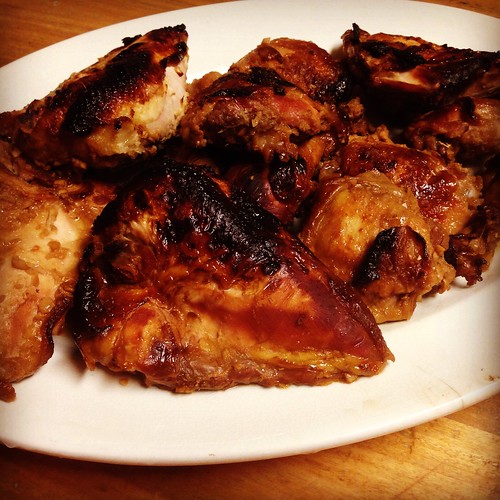
I've mentioned before that SP has taken over cooking Sunday dinner. He's been on an Ina Garten kick lately and was very excited to make her Indonesian Ginger Chicken.


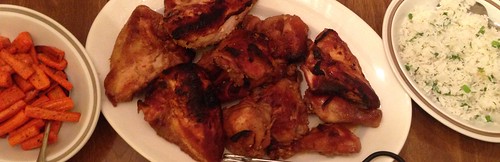
This was some seriously awesome chicken. Incredibly flavorful from the marinade and really easy to cook. He used two cut-up chickens from the grocery store and we noticed that the white meat wasn't nearly as flavorful as the dark meat. You could really taste the marinade in the dark meat pieces. As much as I love white meat, I think this would be best with legs and thighs rather than whole chickens.

Untitled

He served the chicken with herb basmati rice and roasted carrots. At my recommendation, he boiled the marinade to thicken it into a gravy to serve over the chicken. That was a big hit as well.

Indonesian Ginger Chicken
From Ina Garten

1 cup honey
3/4 cup soy sauce
1/4 cup minced garlic (8 to 12 cloves)
1/2 cup peeled and grated fresh ginger
6lbs total bone-in chicken legs and thighs

Cook the honey, soy sauce, garlic, and ginger in a small saucepan over low heat until the honey is melted. Arrange the chicken pieces in 1 layer in a shallow baking pan, skin side down. Pour on the sauce. Cover the pan tightly with aluminum foil. Marinate overnight in the refrigerator.

Preheat the oven to 350 degrees.

Place the baking pan, still covered with the foil, in the oven and bake for 30 minutes. Remove the foil, turn the chicken pieces skin side up, and raise the temperature to 375 degrees. Continue baking for 30 minutes or until the juices run clear when you cut between a leg and thigh and the sauce is a rich, dark brown.

If you want, remove the chicken pieces to a serving platter and cover with foil. Strain the sauce from the baking dish through a sieve and add to a small pot. Boil the sauce until it thickens slightly. Serve as gravy to spoon over the chicken.

Friday, December 12, 2014

December 12, 2014

Hawaiian Pork Sliders

I decided to make these Hawaiian Pork Sliders after my friend Amy posted a photo of them on Instagram. They looked so good I could almost taste them.


I have such a hard time photographing sandwiches. I wonder how the pros do it? I should pay more attention when I see sandwiches or burgers in my feedly. Anyway, despite the less than stellar pictures, these were great. Very simple to throw together and took no time to cook. I served these on King's Hawaiian rolls but we honestly couldn't taste the rolls so next time I'll go with traditional sliders rolls instead. Or maybe I'll make them into regular burgers rather than sliders.

Hawaiian Pork Sliders
As seen on Very Culinary

1 1/2 pounds ground pork
1/2 cup minced scallions
3/4 teaspoon ground ginger
sprinkle of salt and pepper
8 pineapple rings
1/2 cup of your favorite barbecue sauce
mayonnaise
8 King’s Hawaiian or regular slider rolls

In a large bowl, using your hands, mix the pork, scallions, ground ginger, salt and pepper until just combined. Don’t over mix! Gently form 8 equal patties, with a slight indentation in the middle (this helps keep the burgers from bulging in the middle.)

Preheat your grill for medium-high. Coat the grates with oil or nonstick cooking spray. Place the pork patties on the hot grill and lightly coat tops with barbecue sauce. Cover the grill and cook for about 5 minutes. Flip the burgers and coat with more barbecue sauce.

After you’ve flipped the burgers, place the pineapple rings down on the grill. Cook the burgers for another 4-5 minutes, until cooked through. Cook the pineapple rings for about 3 minutes, or until you have nice grill marks on one side. Flip the pineapple and grill another 1-2 minutes. Remove the pineapple and burgers from the grill and let them rest 5 minutes.

While the meat is resting, toast the rolls on the hot grill until the edges brown nicely, about 1-2 minutes.

Spread more barbecue sauce and some mayo on the rolls, add the burger patty and a pineapple ring, then the other roll. Serve immediately.

Monday, December 8, 2014

December 08, 2014

Skillet Chicken Saltimbocca Spaghetti

I've done it again. I'm sorry that I disappeared for a few weeks. This whole blogging thing has become a lot more complicated these days. We're just so busy. And the lack of natural light, coupled with a waning desire to be in the kitchen, isn't exactly conducive to blogging.

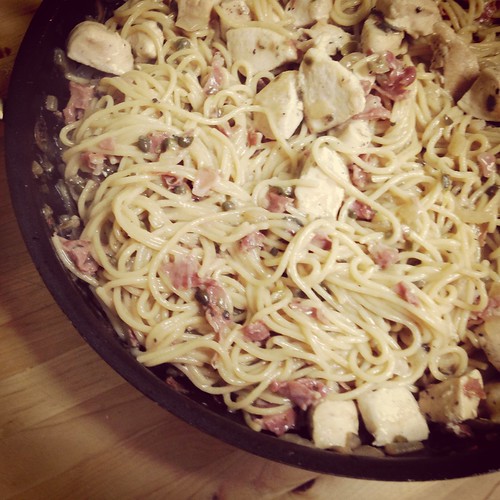
I wish my photo of this Skillet Chicken Saltimbocca Spaghetti was better because this is one outstanding meal. Go look at Elly's photo to see it in all its drool-inducing glory.


We all thought this was outstanding. Baby Girl isn't a huge fan of capers, but otherwise this was right up her alley. I can't wait to make it again.

Skillet Chicken Saltimbocca Spaghetti
As seen on Elly Says Opa!

2 tablespoons olive oil
4 oz. thinly sliced prosciutto, chopped
8 large fresh sages leaves, plus 3 Tbsp. minced sage
1 lb. boneless/skinless chicken breast, cut into pieces
1 medium onion, diced
4 cloves garlic, minced
pinch of red pepper flakes
2 teaspoons flour
1 cup dry white wine
3 1/2 cups low-sodium chicken broth
1 cup water
12 oz. dried spaghetti, broken in half
3 tablespoons capers, rinsed and chopped
2 tablespoons unsalted butter
1/2 teaspoon lemon zest + 2-3 tablespoons juice

Heat 1 1/2 tablespoons of the oil in a large, nonstick skillet over medium-high heat. Add the prosciutto and cook, stirring occasionally, until crisp (about 5 minutes). During the last 30 seconds or so, add the sage leaves and cook until crisp. Using a slotted spoon, transfer the prosciutto and sage to a paper-towel lined plate.

Season the chicken with salt and pepper and then place in the hot skillet. Cook until browned and just shy of cooked through. Remove the chicken and keep warm.

Add the remaining 1/2 tablespoon oil to the skillet. Stir in the onion and cook over medium heat until softened, about 5-6 minutes. Stir in the minced sage, garlic, and red pepper flakes, and saute until fragrant, about 30 seconds. Add the flour and cook for one minute before whisking in the wine. Simmer until reduced by half, about 1-2 minutes.

Slowly whisk in the broth and water. and then stir in the pasta. Increase the heat to medium-high and cook at a vigorous simmer, stirring often with tongs, until pasta is tender and sauce has thickened (about 12 minutes).

Add the chicken and cook just a minute longer, until completely cooked and warmed through. Stir in the capers, butter, lemon zest, and lemon juice, and season to taste with salt and pepper. Serve the pasta with the crispy prosciutto and sage.

Wednesday, November 26, 2014

November 26, 2014

Collard Greens

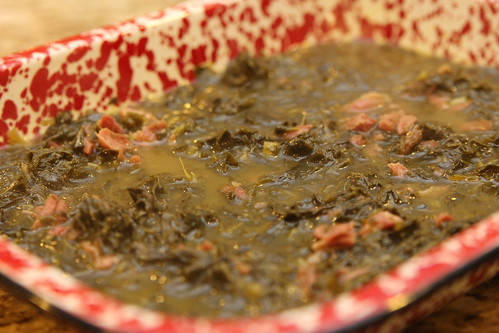
I love collard greens but the last time I tried to make them they were inedible. So. Much. Salt. I vowed to try again for our Southern night redo. This time I pretty much eliminated the salt from the recipe and I nailed it!


These were perfect with fried chicken, mac and cheese and cornbread. It takes some time to prep the collard greens but since you have to boil the water for an hour that's the perfect time to get it done. These were just as good as the ones we get from our favorite BBQ spot - a little spicy and so flavorful.

Collard Greens
Modified from Paula Deen

1 smoked ham hock
1 tablespoon seasoned salt
1/4 teaspoon black pepper
1/2 teaspoon garlic powder
a few dashes Tabasco sauce
1 large bunch collard greens
1 tablespoon butter

In a large pot, bring 3 quarts of water to a boil. Add the ham hock, seasoned salt, black pepper, garlic powder and hot sauce. Reduce heat to medium and cook for 1 hour.

While the water is boiling, wash the collard greens thoroughly. Remove the stems that run down the center by holding the leaf in one hand and stripping the leaf down with your other hand. The tender young leaves in the heart of the collards don't need to be stripped.

Once all the leaves have been washed and dried, stack 6 to 8 leaves on top of one another, roll them up, and slice into 1/2 to 1-inch thick slices.

After the water cooks for an hour, put the greens in the pot and add the butter. Cook for 45 to 60 minutes, stirring occasionally. Taste and adjust the seasoning, if needed. If you want, you can remove the ham hock, allow to cool and pick the meat off the bone. Add the meat to the collard greens and stir to combine before serving.

Monday, November 24, 2014

November 24, 2014

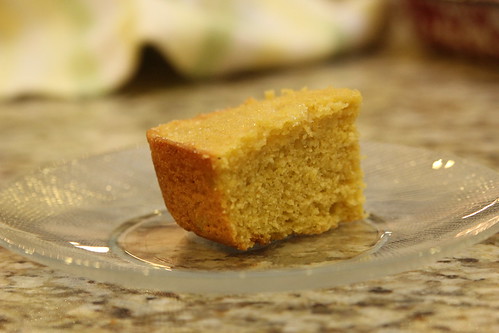
Honey Hush Cornbread

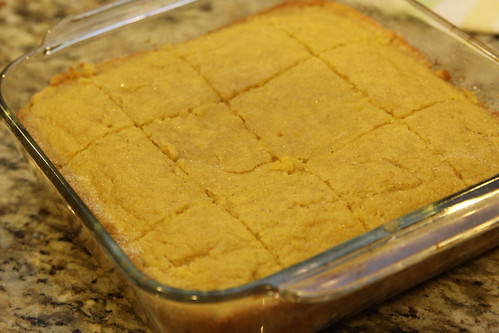
I've been searching for a good cornbread recipe and I think I finally found it. This Honey Hush Cornbread is pretty amazing and so easy to make. Baby Girl helped me mix this one up before our Southern dinner with friends.


This is a sweet cornbread, which I happen to like. I even added a bit of sugar to make a crust on top, just like our favorite Southern restaurant. The flavors are so, so good. You definitely want to eat this warm/hot.


Honey Hush Cornbread
Dinosaur BBQ

vegetable shortening or butter
1 1/4 cups yellow cornmeal
1/4 cup sugar
3/4 cup flour
1 1/2 teaspoons baking powder
1/2 teaspoon baking soda
1/2 teaspoon salt
1 cup buttermilk
2 eggs, slightly beaten
1/2 teaspoon vanilla
1/2 cup butter, melted
2 tablespoons honey
sugar for dusting

Preheat the oven to 350 degrees. Grease an 8x8 inch baking pan with shortening or butter. Put the pan in the oven to heat while you're mixing up the cornbread.

Combine the cornmeal, sugar, flour, baking powder, baking soda, and salt in a large bowl. In another medium bowl, whisk together the buttermilk, eggs, vanilla and melted butter.

Pour the wet ingredients into the dry and stir, just until everything is moistened.

Take the hot pan from the oven and pour in the batter. Bake for 25-30 minutes, or until a toothpick inserted in the middle comes out clean.

Remove the cornbread from the oven and brush the top with honey and dust with sugar. Cool for 10 minutes in the pan before cutting into squares. Serve warm/hot.

Friday, November 21, 2014

November 21, 2014

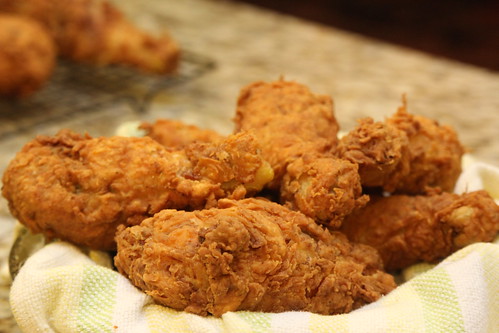
Oven Fried Chicken

You may remember our friends C & T from Mexican night, Italian night and our previous try at Southern night. Unfortunately, the last Southern night was a disaster. Undercooked fried chicken, way too salty collard greens and disappointing cornbread. We didn't eat until almost 9pm because of the darn chicken. We knew we had to try again. Thankfully this time we nailed it.


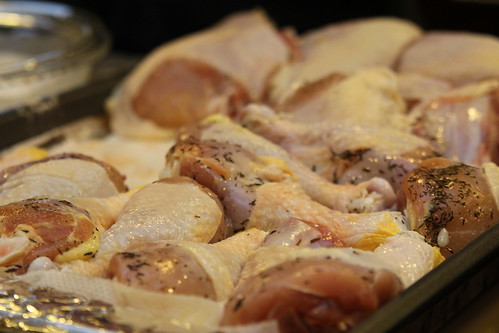
Since T's fryer isn't very big, and because we'd undercooked the chicken the last time, we decided to use Ina Garten's oven method for frying the chicken. This is a truly brilliant method. You fry the pieces so they get a nice, crispy, golden brown crust and then you finish cooking them in the oven. This ensures the chicken is cooked through, but the best part is you can cook a lot of chicken at one time so you're ready to feed a crowd all at once.

Untitled

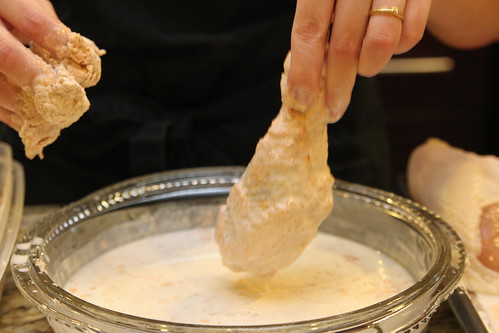
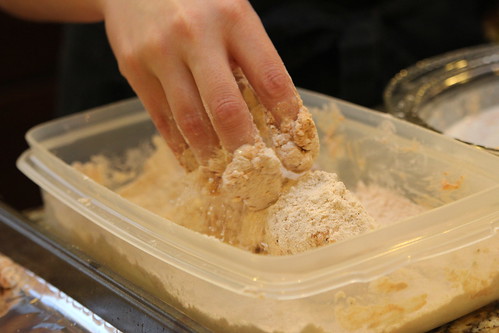
T brined the chicken all day and then she (once again) conned me into breading the chicken while she took pictures. It's a good thing she's an excellent photographer. I dipped the chicken into buttermilk first and then into the seasoned flour, then back into the buttermilk and finished with the flour.


We were able to fry 4 legs or two breasts at once. As each batch was finished, we laid the pieces on a cooling rack. Once the rack was full it went into the oven. Thirty minutes later we took it out and tested each piece with a meat thermometer to make sure it was 165 degrees.


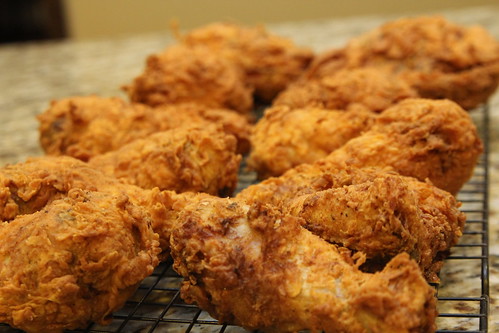
Look at these gorgeous pieces of chicken. Moist and flavorful. We SO nailed it. In addition to the chicken I made cornbread and collard greens. Stay tuned for those recipes to post next week.

Oven Fried Chicken
Prep compiled from various recipes, cooking method from Ina Garten

bone-in chicken pieces (legs, thighs, breasts)
Brine:
kosher salt
sugar
thyme
onion powder
Tabasco sauce
water
Vegetable oil
Breading:
buttermilk
flour
salt
pepper
paprika

Place the chicken pieces in large plastic food storage bags. Fill each bag with water and add some salt, sugar, thyme, onion powder and a few dashes of tabasco sauce. Just use as much as you want - T didn't measure. Refrigerate overnight or at least 6 hours.

Take the chicken out of the brine and let sit, covered, at room temperature for at least 4 hours.

Preheat the oven to 350 degrees. Heat oil into a large heavy-bottomed stockpot to a depth of 1-inch or a deep fryer. Heat to 350 degrees.

Pour some buttermilk into a large bowl. Combine the flour, salt, pepper, and paprika in another large bowl. Coat each piece of chicken in buttermilk then in the flour mixture, back into the buttermilk and into the flour again.

Working in batches, carefully place several pieces of chicken in the oil and fry for about 3 minutes on each side until the coating is a light golden brown (if using a deep fryer, cook for 6 minutes). Don't crowd the pieces.

Remove the chicken from the oil and place each piece on a metal baking rack set on a sheet pan. Allow the oil to return to 360 degrees before frying the next batch. When all the chicken is fried, bake for 30 to 40 minutes, until the chicken is no longer pink inside and registers 165 degrees on a thermometer.

Monday, November 10, 2014

November 10, 2014

One Pot Baked Rice with Sausage and Broccoli

Like most people, I'm a big fan of one pot meals. So when my friend Amy posted this recipe for {One Pot} Baked Rice with Sausage and Broccoli I knew I had to try it.


After reading the recipe I was skeptical and I actually messaged Amy to make sure it was only 2 1/4 cups of chicken broth to 1 1/4 cups of Arborio rice. You know Arborio rice as the rice used to make risotto. Whenever I make risotto I need at least 5, usually 6, cups of chicken broth to fully cook the rice. I couldn't imagine using just 1/3 that amount in this dish. But Amy assured me it was correct and since I trust her, I went with it (although I did threaten her with our pizza delivery bill if she steered me wrong).

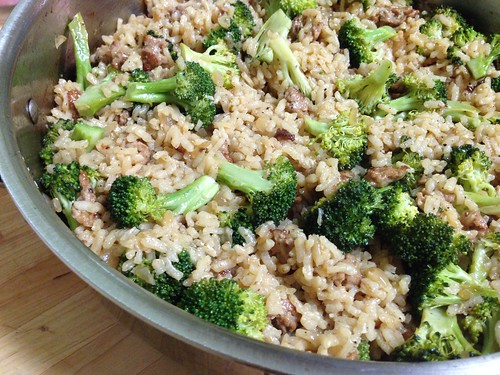
And you know what, it worked! The resulting dish isn't creamy like risotto, but the rice was fully cooked. And quite tasty. The original recipe calls for 8oz of sausage but SP thought that wasn't enough so I upped the recipe below to a full pound. Otherwise this was perfect. And so ridiculously simple, too. I love easy weeknight meals and this was definitely one I'll be making again.

{One Pot} Baked Rice with Sausage and Broccoli
As seen on Very Culinary

2 tablespoons extra virgin olive oil
1 pound Italian sausage, casings removed, broken into pieces
1 medium sweet onion, finely diced
3 cloves garlic, minced
salt and pepper
1 1/4 cups Arborio rice
1/4 cup dry white wine
2 1/4 cups low sodium chicken broth
1 head of broccoli (about 6 ounces), cut into 2-inch florets

Preheat oven to 400.

Heat oil in a large, heavy ovenproof skillet, over medium-high. Cook sausage, stirring often, breaking up the pieces until no pink remains, about 3 minutes. Stir in onion and garlic; cook until translucent, about 3 more minutes. Season with a little salt and pepper.

Stir in rice to coat in the oil, then add the wine. Bring to a boil. Cook until the rice has absorbed almost all of the liquid, about 1 minute. Add the broth and bring back to a boil.

Transfer the skillet to the oven and bake for 10 minutes. Sprinkle the broccoli over the top of the rice and bake for another 10 minutes, until the rice has absorbed most of the liquid.

Carefully remove the skillet from the oven and stir the rice and broccoli together. Cover the skillet and let it stand for 10 more minutes. Place a pot holder on the handle so you don't forget that it's hot.

Taste and add more salt and pepper, if necessary. Serve.

Friday, November 7, 2014

November 07, 2014

Chicken Stew with Biscuits

It's official - SP is now in charge of Sunday dinner at my parent's house. Weekends are really the only chance he has to cook since he's got such a long commute, so it's a win-win. As much as I love cooking, it's nice to get a break every once in awhile.

He's been on the hunt for new recipes and came across Ina's Chicken Stew with Biscuits. This is a dish I've had my eye on for years but, and this may be sacrilege, I'm not really a chicken pot pie fan. I know, I know. And since this is basically chicken pot pie filling topped with biscuits, I wasn't sold on the idea. But everyone else loves chicken pot pie so I took one for the team.


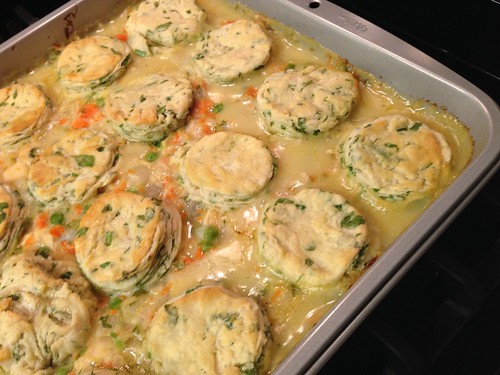
This was incredible. And that's saying a lot coming from me. The chicken was moist and tender, the veggies were perfectly cooked. Everything was perfectly proportioned. The biscuits were just OK, not very flaky or fluffy, but SP has plans to make different biscuits next time. My parents also loved it, so it's a good thing the recipe makes enough to feed an army. SP, my mom and my stepdad all had seconds and we still had 6 servings leftover. Sheesh!


This does take quite a bit of prep work and time, so it's not a weeknight meal, but you can make it on a weekend and bake it during the week. And the leftovers reheated quite well.

Chicken Stew with Biscuits
From Ina Garten

6 split chicken breasts, bone in, skin on
3 tablespoons olive oil
Kosher salt and freshly ground black pepper
5 cups chicken stock
2 chicken bouillon cubes
1 1/2 sticks unsalted butter
2 cups chopped yellow onions (2 onions)
3/4 cup flour
1/4 cup half and half
2 cups medium-diced carrots (4 carrots), blanched for 2 minutes
1 10-ounce package frozen peas (2 cups)
1 1/2 cups frozen pearl onions
1/2 cup minced fresh parsley

For the biscuits:
2 cups flour
1 tablespoon baking powder
1 teaspoon kosher salt
1 teaspoon sugar
1 stick cold unsalted butter, diced
3/4 cup half-and-half
1/2 cup chopped fresh parsley
1 egg mixed with 1 tablespoon water, for egg wash

Preheat the oven to 375.

Place the chicken breasts on a sheet pan and rub them with olive oil. Sprinkle generously with salt and pepper. Roast for 1 hour. Set aside until cool enough to handle, then remove the meat from the bones and discard the skin. Cut the chicken into large dice.

In a small saucepan, heat the chicken stock and dissolve the bouillon cubes in the stock.

In a large pot or Dutch oven, melt the butter and saute the onions over medium-low heat for 10 to 15 minutes, until translucent. Add the flour and cook over low heat, stirring constantly, for 2 minutes. Add the hot chicken stock to the sauce. Simmer over low heat for 1 more minute, stirring, until thick. Add 2 teaspoons salt, 1/2 teaspoon pepper, and the half and half. Add the cubed chicken, carrots, peas, onions, and parsley. Mix well.

Put the stew in a lasagna pan or 10 x 13 x 2-inch oval or rectangular baking dish. This will NOT fit in a standard 9 x 13 dish - you need something deeper. Place the baking dish on a sheet pan lined with parchment or wax paper. Bake for 15 minutes.

Meanwhile, make the biscuits. Combine the flour, baking powder, salt, and sugar in the bowl of an electric mixer fitted with the paddle attachment. Add the butter and mix on low speed until the butter is the size of peas. Add the half-and-half and combine on low speed. Mix in the parsley. Dump the dough out on a well-floured board and, with a rolling pin, roll out to 3/8-inch thick. Cut out twelve circles with a 2 1/2-inch round cutter.

Remove the stew from the oven and arrange the biscuits on top of the filling. Brush them with egg wash, and return the dish to the oven. Bake for another 20 to 30 minutes, until the biscuits are brown and the stew is bubbly.

Note: To make in advance, refrigerate the chicken stew and biscuits separately. Bake the stew for 25 minutes, then place the biscuits on top, and bake for another 30 minutes, until done.

Monday, November 3, 2014

November 03, 2014

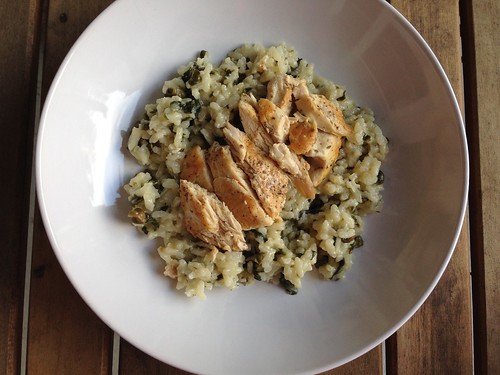
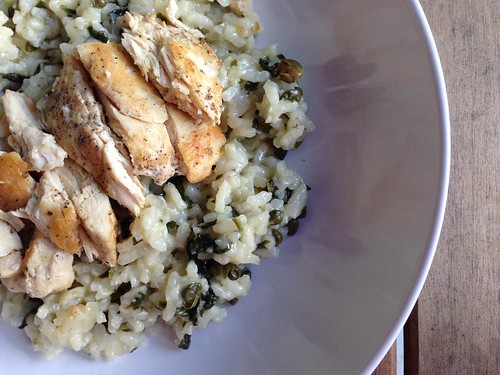
Chicken Piccata Risotto with Crispy Capers

This. Was. Incredible.

Chicken piccata risotto

It's times like these that I wish I was a better food photographer. I don't feel like my photos adequately express how amazing this was, and that makes me sad. Because I want every person who reads this post to make this dish. That's how much we enjoyed it.

Chicken piccata risotto

Baby Girl is a big risotto fan and I'm always on the lookout for new recipes. I saw this Lighter Chicken Piccata Risotto with Crispy Capers on Iowa Girl Eats and as soon as I saw her post I knew we'd love it. I'm a sucker for all things salty and the tang from the capers and lemon was just perfect.

The original recipe calls for adding all the chicken broth at once, but I'm a purist when it comes to risotto. I also omitted the garlic and added some white wine because that's how I always make risotto. SP had a work dinner the night I made this so he didn't get to taste it until lunch the next day. He actually sent me an email to say lunch was excellent. I can't wait to make this one again.

Chicken Piccata Risotto with Crispy Capers
Very slightly modified from Iowa Girl Eats

6-7 cups chicken broth
2 tablespoons extra virgin olive oil, divided
2 tablespoons butter, divided
1 large shallot, chopped
1 teaspoon fresh thyme, minced
salt and pepper
1 1/2 cups arborio rice
1/4 cup dry white wine
2 cups baby spinach, roughly chopped
1 lemon, cut in half
1/4 cup freshly grated parmesan cheese
1/4 cup capers, drained and patted dry
2 chicken breasts, cut in half lengthwise

Bring chicken broth to a boil in a saucepan then turn down the heat and keep at a simmer.

In a deep, heavy skillet, melt 1 tablespoon butter and 1 tablespoon oil over medium-high heat. Add the shallot, season with salt and pepper, and saute for about 2 minutes or until the shallot is tender. Add the thyme and cook for one minute, then add the rice. Cook for another 2-3 minutes to toast the rice, stirring frequently.

Add the white wine and bring to a boil. Once the rice has absorbed the wine, add 1 ladle (approx. 1 cup) of the simmering stock, and keep stirring nearly constantly, making sure to push down any rice stuck to the edges of the pans. Once the liquid is nearly absorbed, add another ladleful of stock. Continue to do this until the rice is cooked but still slightly chewy, about 25 minutes. Taste the rice frequently to check the consistency. If you notice you're running low on broth, add more to the saucepan so you don't run out.

When nearly all the broth has been absorbed but the rice is still creamy, add the spinach. Once the spinach is wilted, taste the rice to make sure it's done. Remove the pan from the heat then stir in the juice from 1/2 lemon, Parmesan cheese, and remaining 1 tablespoon butter. Taste, add salt and pepper if necessary and set aside.

While the risotto is cooking, heat 1 tablespoon of olive oil in a large skillet over medium-high heat. Add the capers and sauté until slightly opened, brown, and crispy, 2-3 minutes. Transfer with a slotted spoon to a paper towel-lined plate to drain.

Season the chicken breasts on both sides with salt and pepper then saute in the caper-infused olive oil, 4 minutes per side. When the chicken has 1 minute left to saute, squeeze the second lemon half over the chicken.

To serve, plate the risotto then top with a piece of chicken. Sprinkle some of the crispy capers on top.