Cooking Recipe For All

Get all Item Recipes is Here

Breaking

Friday, September 11, 2015

September 11, 2015

Chicken Piccata with Lemony Noodles

My family loves a good chicken and pasta dish so this recipe for Chicken Piccata with Lemony Noodles was right up our alley. Simple yet bold flavors from the lemon juice and the capers really make the dish.
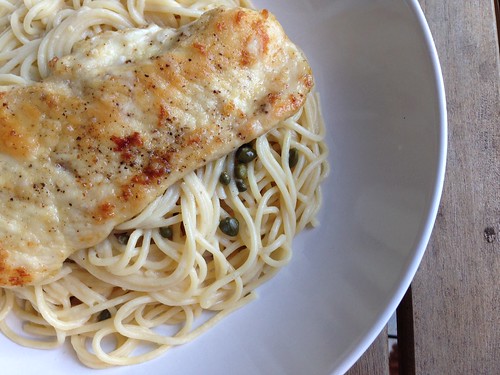
Chicken piccata

I rarely make a full pound of pasta anymore and it didn't sound like there would be enough sauce, but I went ahead and made the whole box (actually, since I buy Dreamfields pasta, it was 13.25-oz) and there was too much pasta and not enough sauce. I increased the liquid below and decreased the pasta to 8 ounces. I think that will be a better ratio since hot pasta is like a sponge and soaks up all the liquid.
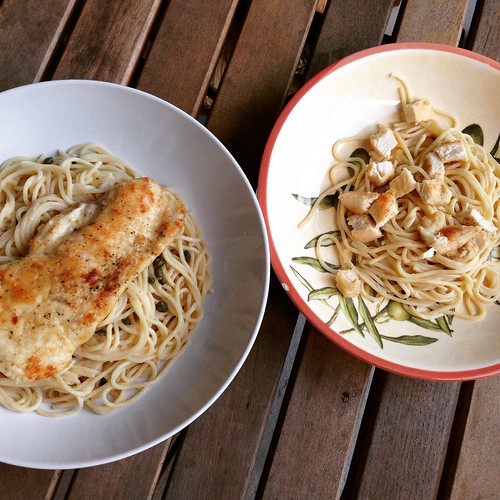
Chicken piccata

And one more photo because Baby Girl loves it when I photograph our plates together.

Chicken Piccata with Lemony Noodles
As seen on So Tasty, So Yummy

3 boneless, skinless chicken breasts
1/2 cup flour
1/2 teaspoon salt
1/2 teaspoon pepper
2 tablespoons butter
2 tablespoons olive oil
2 cloves garlic, minced
1 cup chicken broth
1/2 cup dry white wine
Juice of 1 lemon
1 cup half and half, plus more if needed
1 tablespoon drained capers
8 ounces spaghetti, angel hair or linguine

Slice each chicken breast in half lengthwise. In a food storage bag, combine the flour, salt and pepper. Add the chicken, seal the bag, and toss to coat.

Heat the butter and oil in large skillet over medium heat. Add the chicken and cook until golden brown, about 3 minutes per side. Remove the chicken to a plate.

Add the garlic and sauté for 30 seconds. Add the broth, wine and lemon juice, whisk and scrape the bottom of the skillet. Cook until the sauce is reduced by half. Add salt and pepper to taste. Reduce the heat to low, stir in the cream and capers.

While the chicken and sauce are cooking, cook and drain the pasta. Toss the drained noodles with the sauce. Serve with slices of the chicken on top.

Tuesday, September 8, 2015

September 08, 2015

Caprese Salad with Warm Bacon Dressing

Raise your hand if you're mourning the end of summer. I know I am. I love everything about summer - the warmth, the sun setting later, the pool, the beach, kids playing in the backyard before bed. I'm not one of those people who looks forward to fall with its cooler temps, sweaters and boots. Give me t-shirts and flip flops any day.

But, alas, summer is winding down. The good news is, this is the time when Jersey tomatoes are still at their best and there's no better way to showcase them than in caprese salad. I'm not usually one to mess with perfection. Caprese, with its creamy fresh mozzarella and red ripe tomatoes sprinkled with basil is my idea of a perfect summer meal. I love to eat it plain or tossed with pasta.

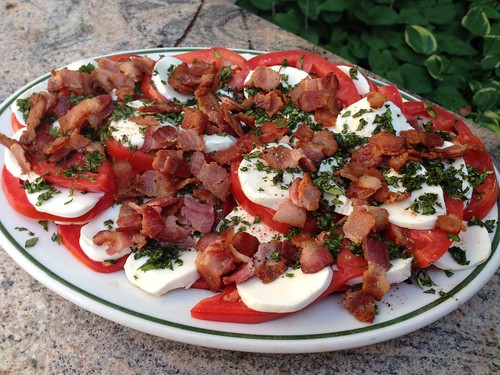
Caprese with warm bacon dressing

Then I saw this recipe for Caprese Salad with Warm Bacon Dressing. I was skeptical at first. Bacon on caprese? With red wine vinegar? Admittedly, I'm not a fan of balsamic on caprese, so I was hesitant to try this. But I'm so glad I did. We had this with my parents for Labor Day dinner and we were fighting over it. The crispy bacon is the perfect contrast to the mozzarella and tomatoes and the warm dressing, with just the right amount of tang from the red wine vinegar, is addictive.

Caprese Salad with Warm Bacon Dressing
As seen on Fake Ginger, adapted from Southern Living

2 1/2 pound beefsteak tomatoes, cut into 1/2-inch slices
8 ounces fresh mozzarella, cut into 1/2-inch slices
1/2 cup fresh basil leaves, finely minced
6 thick bacon slices, chopped into bite-size pieces
2 tablespoons red wine vinegar
1/2 teaspoon salt
1/2 teaspoon pepper

Arrange the tomatoes and mozzarella on a serving platter. Sprinkle with the minced basil.

Saute the bacon pieces in a large skillet over medium heat until crisp. Remove the bacon pieces to a paper towel-lined plate. Transfer 2 tablespoons of the bacon fat to a small bowl. Let stand for 1 minute, then whisk in the vinegar, salt, and pepper. Add the bacon pieces to the dressing and stir to combine. Drizzle the dressing over the salad right before serving.

Friday, September 4, 2015

September 04, 2015

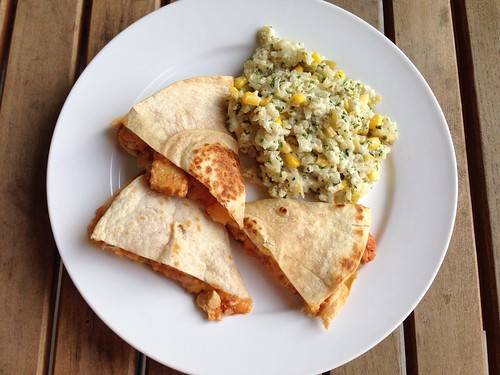
Recipe Redo: Texas BBQ Chicken Quesadillas

I've been making these Texas BBQ Chicken Quesadillas for years but I've never blogged them properly, with an actual recipe and a decent photo. I made them for dinner tonight and figured now was as good a time as any, seeing as some Facebook friends were asking for the recipe.

BBQ chicken quesadillas

Use your favorite BBQ sauce for the chicken. We like Dinosaur sauce.

Texas BBQ Chicken Quesadillas
As seen on Allrecipes

2 tablespoons oil
2 onions, sliced into thin rings
1 tablespoon honey
2-3 chicken breasts, diced
1/2 cup BBQ sauce
cooking spray
4 10-inch (burrito size) flour tortilla
shredded Mexican cheese

Preheat the oven to 350. Line a baking sheet with foil.

Heat 1 tablespoon of the oil in a pan over medium high heat. Add the onions and cook until they begin to caramelize, stirring often, about 20 minutes. Turn the heat down if the onions are browning too quickly. You want them to be soft and deeply brown. Mix in the honey and stir to combine. Remove the onions to a bowl and set aside.

Put the remaining 1 tablespoon oil in the pan and add the chicken. Cook over medium high heat until cooked through, about 5 minutes. Off heat, stir in the BBQ sauce to evenly coat the chicken.

Coat a griddle pan or large, flat skillet with cooking spray and add one of the tortillas. Heat over medium heat until hot, then add one of the tortillas. Cook until the tortilla is lightly browned on both sides. Remove the tortilla to a cutting board and repeat with the other 4 tortillas.

While the other tortillas are cooking, start assembling the quesadillas. Lay one tortilla flat and add some shredded cheese to one half. Top with a quarter of the onions and a quarter of the chicken. Add some more cheese, then fold the tortilla in half. Place on the prepared baking sheet. As the other tortillas brown, assemble in the same way.

Once all the quesadillas have been assembled, put the baking sheet in the oven for about 10-15 minutes to melt the cheese.

Thursday, August 20, 2015

August 20, 2015

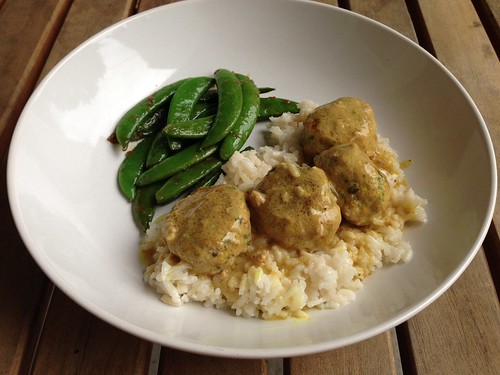
Lemon Parsley Turkey Meatballs in Curry Sauce over Coconut Rice

I've become obsessed with meatballs.

Turkey meatballs coconut rice

My friend, Jaida, posted this recipe for Lemon Parsley Turkey Meatballs with Lemon Coconut Curry Sauce and Lemon-Coconut Rice (sorry, Jaida, I had to shorten the name) last month and I couldn't wait to make them. She came up with this one all on her own, which is pretty amazing if you ask me.

We're also obsessed with coconut rice in this house and these delicious, light meatballs in a drinkably good curry sauce were the perfect thing to serve on top. I decided to make a few changes to Jaida's original recipe to suit our tastes and it did not disappoint. I'm already plotting when I can make it again.

Lemon Parsley Turkey Meatballs in Curry Sauce over Coconut Rice
Slightly modified from Sweet Beginnings

Lemon-Parsley Turkey Meatballs
1 lb ground turkey
Zest and juice of 2 medium-large lemons
1/4 cup parsley leaves, chopped
Salt and pepper, to taste
1/3 cup Panko bread crumbs
1 egg
1 tablespoon olive oil

Coconut Rice
1 tablespoon butter
1 cup long-grain rice
1 cup coconut milk
1 cup water

Curry Sauce
1 can, plus what's left in the can used for the rice, coconut milk
Juice of 1 large lemon
2 teaspoons yellow curry powder
Salt and pepper, to taste

In a large bowl, combine all of the meatball ingredients, except the olive oil. Gently mix with your hands until well combined. Take about 2 tablespoons of the meat at a time and form into balls. Place each meatball on a plate and repeat with all the meat. Heat 1 tablespoon of olive oil in a large skillet over medium-high heat and swirl around to coat the bottom of the pan. Once hot, add the meatballs so that they are not touching. Cook for 2-3 minutes per side, until all sides are browned. Reduce the heat to medium.

While the meatballs are cooking, heat 1 tablespoon of butter over medium heat in a large saucepan. Once the butter is melted, add the rice and stir to coat each grain evenly. Toast the rice for a few minutes, until you start to see brown spots. Add the coconut milk and water and bring to a boil. Reduce the heat, cover, and let simmer for 20 minutes. Remove from heat and let sit while you finish the meatballs and sauce.

Put all the sauce ingredients in a small saucepan over medium heat. Heat, stirring occasionally, while the meatballs cook. Once the meatballs have been browned, carefully pour the sauce over the meatballs. Simmer for 5-10 minutes, until the sauce thickens slightly and the meatballs are cooked all the way through.

Serve the meatballs and sauce over the rice.

Thursday, July 23, 2015

July 23, 2015

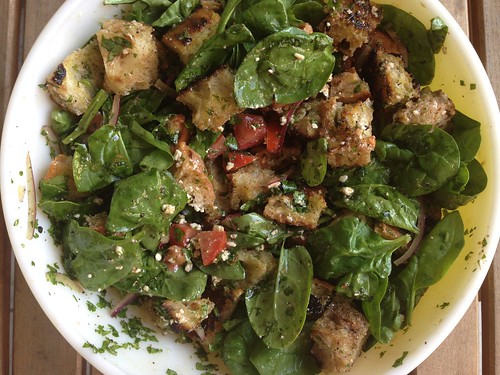
Grilled Ciabatta Bread Salad

My friend Mary Ellen made this Grilled Ciabatta Bread Salad for us twice before I finally got off my butt and made it myself. It's one of SP's favorite salads so he's been bugging me to make it.

Grilled bread salad

We have a charcoal grill, which makes it harder to control the heat of the fire. My bread got pretty blackened so I had to cut some sections off (I really dislike overly charred food), but that was no big deal. This made a TON of salad, way more than the three of us could eat, so next time I'll cut the recipe in half or just make it when we have company.

Grilled Ciabatta Bread Salad
As seen on Mary Ellen's Cooking Creations

1/2 small red onion, thinly sliced
1 small bunch cilantro, chopped
1 cup good olive oil, divided
1 loaf ciabatta bread
1 6-oz bag baby spinach
2 tomatoes, chopped
blue cheese or feta crumbles, to taste

1/2 cup balsamic vinegar
Salt, pepper and oregano, to taste

Place onions, cilantro and 1/2 cup olive oil in a large bowl and toss together. Let marinate in the fridge while you grill the bread.

Slice the bread into two long halves. Spray or brush with cooking spray/olive oil, season with salt and pepper and grill until charred on both sides.

Let the bread rest until it's cool enough to handle, then chop into 1 inch pieces. Add bread cubes to the onion and cilantro mixture, along with the remaining 1/2 cup olive oil. Chill at least 30 minutes.

Before serving, add the tomatoes, spinach and cheese. Toss with the balsamic (start slowly and add to taste), salt, pepper and oregano to taste. Serve immediately

Monday, July 6, 2015

July 06, 2015

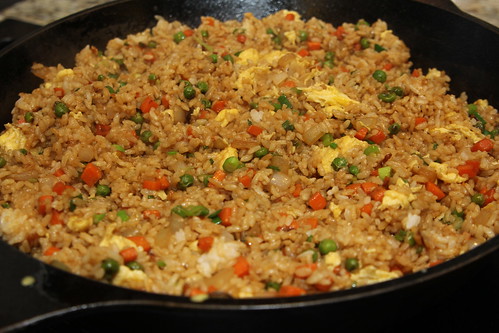
Fried Rice

One of T's contributions to our Asian dinner was Fried Rice. But in true form, she managed to be busy when it was time to cook the rice so the task fell to me. I pick on her about this all the time, her knack for finding something else to do when I'm in her kitchen so she's off the hook for cooking. I actually don't mind - I love cooking in her kitchen. There's so much room!

Asian night
(all photos by T. Casey)

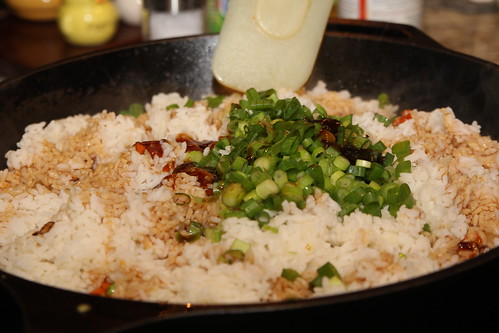
Anyway, let's talk about this fried rice. T did all the prep the day before (a must when making fried rice - the rice needs to be pre-cooked and cold) so all I had to do was throw it all together in her huge cast-iron skillet.

Asian night

This was outstanding. So fresh and flavorful. T doubled the recipe for our dinner and it was enough to feed 6 adults, 2 kids plus two of T's adult kids who scrounged the kitchen for leftovers after we'd eaten.

Fried Rice
As seen on Gimme Some Oven

3 tablespoons butter, divided
2 eggs, beaten
2 medium carrots, peeled and diced
1 small white onion, diced
1/2 cup frozen peas
3 cloves garlic, minced
salt and pepper
4 cups cooked and chilled short-grain white rice
3 green onions, thinly sliced
3-4 tablespoons soy sauce, or more to taste
2 teaspoons oyster sauce
1/2 teaspoon toasted sesame oil

Heat 1/2 tablespoon of butter in a large skillet over medium-high heat until melted. Add the beaten egg, and cook until scrambled, stirring occasionally. Remove egg to a separate plate.

Add an additional 1 tablespoon butter to the pan and heat until melted. Add carrots, onion, peas and garlic, and season with a generous pinch of salt and pepper. Saute for about 5 minutes or until the onion and carrots are soft.

Increase heat to high, add in the remaining 1 1/2 tablespoons of butter, and stir until melted. Immediately add the rice, green onions, soy sauce and oyster sauce and stir until combined. Continue stirring for an additional 3 minutes to fry the rice. Then add in the eggs and stir to combine. Add the sesame oil, stir to combine, and remove from heat.

Serve warm.

Monday, June 29, 2015

June 29, 2015

Pork and Shrimp Dumplings

The theme for our latest dinner with our friends C & T was Asian food. We usually pick one recipe to make at T's house and this time we chose Steamed Dumplings. I've never made dumplings before and incorrectly assumed they'd be a lot of work. Nope!

Asian night
(all photos by T. Casey)

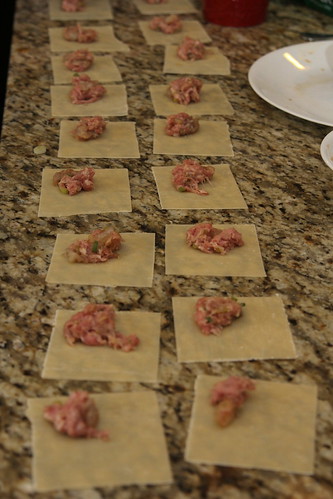
T always cons me into doing all the work (just kidding, I love cooking in her gorgeous kitchen). After I mixed up the filling we assembled the first batch, placing up a little bit of filling onto each dumpling wrapper, wiping the edges with water, and then folding the dough into a triangle. Then we pinched the two edges together to make little packages.

Asian night

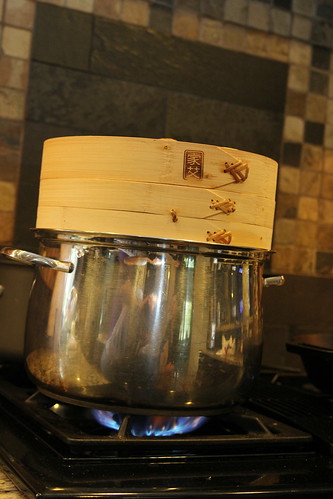
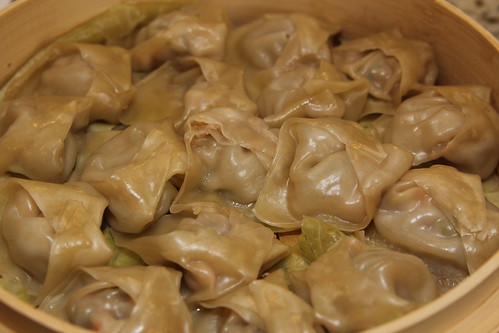
SP and I got a bamboo steamer as a wedding present and had never used it. Oops! We lined the bottom with cabbage leaves, placed the dumplings on top and set it over a pot of boiling water for 10 minutes.

Asian night

These dumplings were outstanding. They had great flavor from the filling and the dipping sauce (which mirrored those same flavors) was perfect. We all gobbled them up. We doubled the recipe below so we had 40+ dumplings for 6 adults and 2 kids and it wasn't enough. Thankfully we had extra filling and T had more wrappers in her fridge, so I quickly assembled another 20 dumplings. The kids would run into the room, grab a handful of dumplings off the platter and run off to play, then come back for more. So, so good.

Asian night

I can't wait to make these again. My mom has already put her in request.

Pork and Shrimp Dumplings
From Rasa Malaysia
Makes about 20-24 steamed dumplings

1/2 pound ground pork
8-10 medium-sized shrimp, peeled, deveined, and cut into small pieces
1 scallion, finely chopped
3 dashes white pepper
1 teaspoon Shaoxing wine or sherry
1/2 teaspoon salt
1/2 teaspoon soy sauce
1/4 teaspoon sesame oil
1 inch ginger, peeled and grated
1 pack potsticker/dumpling wrappers

Combine the ground pork, shrimp, chopped scallions, ginger, and all the seasonings together. Mix well and set aside.

To make dumplings, place a small spoonful of the filling in the center of a wrapper. Dab a little water with your finger and circle around the edge of the skin, and then fold and pleat the dumpling accordingly. Repeat the same for the rest.

Arrange the dumplings in a bamboo steamer (lined with parchment paper or cabbage leaves at the bottom) and steam for 8-10 minutes. Serve immediately with dipping sauce.

To pan fry the dumplings: heat a large skillet and swirl some oil around to coat the pan. Add a single layer of pot stickers. Cook for 2 to 3 minutes until they begin to turn golden on the underside. Don't move them. Add 1/4 cup of water to the pan and cover immediately. Cook for 5 minutes, or until the meat is cooked through and the dumplings release from the pan. Serve immediately with the dipping sauce.

Soy-Vinegar Dipping Sauce
From Martha Stewart

1/2 cup soy sauce
1 teaspoon rice vinegar
1/2 teaspoon toasted sesame oil
2 teaspoons sugar
1 scallion, trimmed and sliced
2 tablespoons water

Combine all ingredients for the dipping sauce in a small bowl.

Thursday, June 25, 2015

June 25, 2015

Quick Stir-Fried Snow Peas or Sugar Snap Peas

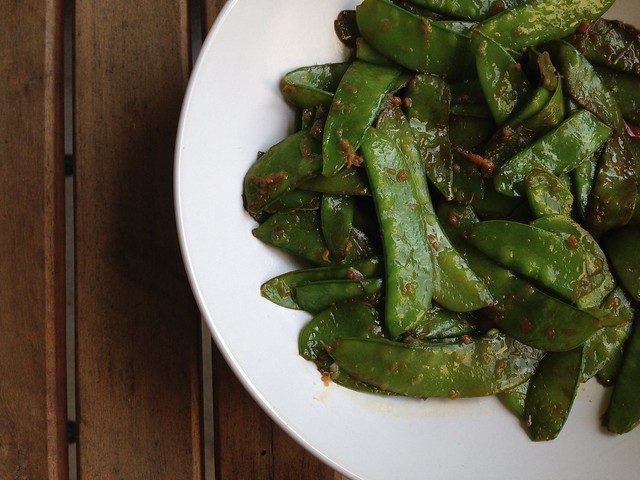
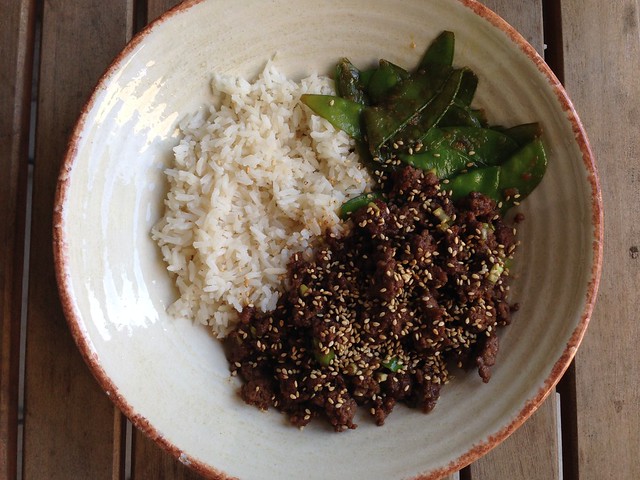
Baby Girl loves snow peas. Usually she eats them raw but I wanted to try cooking them as a side dish for dinner one night. After a quick Google search I found this recipe for Quick Stir-Fried Snow Peas or Sugar Snap Peas. The ingredients closely mirrored my main dish (a family favorite - Cheater Korean Beef) so I thought it would be perfect

Snow peas

Sadly, I overcooked the snow peas, but they were still tasty. Baby Girl told me she loved the flavor but wished they were still crispy like when she eats them raw. Next time (and there will definitely be a next time) I won't let them go too far.

Snow peas

Quick Stir-Fried Snow Peas or Sugar Snap Peas
As seen on Diner's Journal from the NY Times

2 tablespoons canola, vegetable or peanut oil
1 1/2 pounds snow or sugar snap peas, washed and trimmed
1 tablespoon minced ginger
1 tablespoon minced garlic
1 teaspoon dark sesame oil
1 to 2 tablespoons soy sauce

Place 2 tablespoons oil in a large, deep skillet or wok and turn heat to high. When it begins to smoke, toss in peas and cook, stirring almost constantly, until they are glossy, bright green and begin to show a few brown spots, about 5 minutes.

When peas are almost done, stir in ginger and garlic, and cook another minute or so. Turn off heat and remove peas to a platter. Drizzle with dark sesame oil and soy sauce. Taste and adjust seasoning, and serve.

Monday, June 8, 2015

June 08, 2015

Cut-Out Sour Cream Sugar Cookies

::waves hi:: I hope you guys are still with me. I didn't realize I'd taken such a long break. It was completely unintentional, actually. Here's the short explanation before I tell you about these cookies I made for Christmas.

Long story short, blogging isn't as much fun for me as it used to be. I've never been a big-name blogger but I started to get annoyed that my photos aren't that good, that I always had to try new recipes instead of remaking old favorites, that I wasn't interested in food trends like spiralizers and zoodles. Frankly, blogging became a chore so I just stopped doing it. I can't remember the last time I photographed a meal with the intention of blogging about it. I started remaking dishes I hadn't made in years and just enjoyed eating with my family every night.

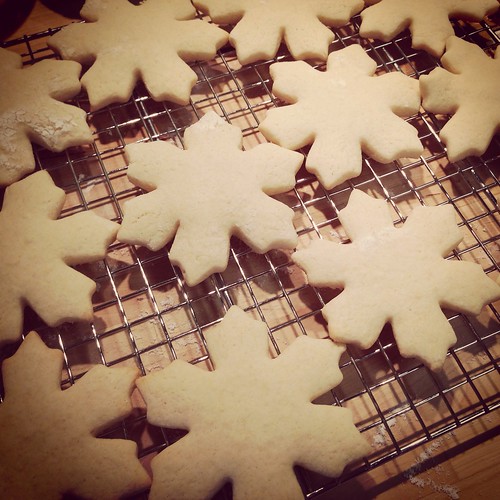
Last night I realized it had been more than a month since I blogged and I figured I should see if I had any recipes in my draft folder that I could write about. And I found these Cut-Out Sour Cream Sugar Cookies that I made for Christmas.

Sour cream sugar cookies

I never even grabbed a shot of these frosted so you'll just have to take my word for it that the frosting was awesome. Baby Girl and I made these together and they were so easy and so delicious. Definitely my go-to cookie recipe for the holidays from now on.

I don't know how often I'll blog in the coming weeks/months, but I'm actually making a new recipe tonight. If it's good, I'll blog about it. If you want to follow me on Instagram you can see all the food photos I do take, although it's not always of things I've cooked.

Cut-Out Sour Cream Sugar Cookies
By Monica

FOR COOKIE DOUGH:
2 3/4 cups flour
1/2 teaspoon baking soda
1/4 teaspoon salt
1/2 cup sour cream, room temperature
1/2 cup butter, softened
1 cup sugar
1 egg
1/2 teaspoon vanilla

FOR FROSTING (makes 1/2 cup of frosting):
1 cup powdered sugar
1 tablespoon butter, softened
1/2 teaspoon vanilla
2 tablespoons half and half
food coloring

In large bowl, whisk together flour, baking soda, and salt; set aside. In second large bowl, with an electric mixer, cream the sour cream and butter at low speed; add sugar, eggs, and vanilla and mix until combined. (It's okay if it's a little lumpy as long as no butter chunks are visible.) Gradually add the flour mixture to the sour cream mixture, mixing until well combined. Dough will be sticky. (You can stir it by hand with a wooden spoon.) Divide dough onto two pieces of plastic wrap; flatten dough, wrap tightly, and refrigerate 1-2 hours. (Make ahead tip: Dough may be made to this point and refrigerated for up to 3 days or frozen for up to 1 month.)

Preheat oven to 350 degrees. Line 2 baking sheets with parchment paper; set aside.

Generously flour your counter and rolling pin. Sprinkle the top of the dough with more flour. Starting at the center, roll the dough out until dough is an even 1/4" thick all over. Dip cookie cutter in flour and cut out dough shapes. Transfer dough shapes to baking sheets.

Bake 2 sheets at a time for 8-10 minutes, rotating and switching pans half way through cooking time. Bake just until they are cooked all the way through but haven't started browning on the bottom. Transfer hot cookies to a baking rack to cool completely.

Combine powdered sugar, softened butter, vanilla, and half of the half and half in a large bowl. Use an electric mixer to combine ingredients on a low speed until you have a thick paste and all of the lumps are gone. Gradually add remaining half and half and continue mixing on medium speed until frosting is a smooth, silky, spreadable consistency. If it's still too thick, add more cream 1/2 teaspoon at a time. Mix in food coloring, if desired. Frost each cookie and decorate with sprinkles while frosting is still wet. Leave out to dry for several hours until dry to touch before storing in an airtight container. If stacking frosted cookies, put waxed or parchment paper between layers.

Friday, May 1, 2015

May 01, 2015

Homemade Tater Tots

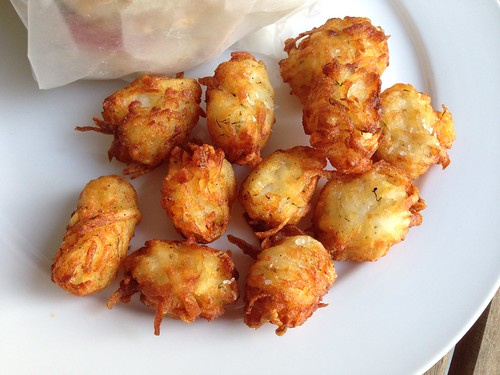
Sometimes I see a recipe and I have to make it right away. That was the case with these Homemade Tater Tots. I was reading my blog feed on a Friday afternoon and came across this recipe. Baby Girl doesn't like tater tots, (for some reason she isn't a fan of most potato dishes) but she was going to my parent's house for a sleepover that night. Score! I immediately went into my kitchen to see what kind of potatoes I had. Unfortunately I only had red potatoes, but I forged ahead anyway.

Tater tots

Red potatoes have less starch and more sugar, so they're drier and stickier than a russet. I had a heck of a time forming these into tots, but I persevered with a bowl of water to rinse my hands. I can't wait to make these again, but with a russet instead. They're starchy and light, which makes them perfect for frying. Even so, these were really good. SP loved them. Now if only we could get Baby Girl to like them...

Homemade Tater Tots
As seen on Damn Delicious

2 pounds russet potatoes, peeled
1 tablespoon all-purpose flour
1 teaspoon garlic powder
1/2 teaspoon onion powder
1/4 teaspoon dried oregano
1/4 teaspoon dried dill
Kosher salt and freshly ground black pepper, to taste
1 cup vegetable oil

Place potatoes in a large saucepan and cover with cold water by 1 inch. Bring to a boil and cook until parboiled, about 6-7 minutes; drain well and let cool.

Using a box grater, finely shred potatoes. Using a clean dish towel or cheese cloth, drain potatoes completely, removing as much water as possible.

Transfer potatoes to a large bowl. Stir in flour, garlic powder, onion powder, oregano and dill; season with salt and pepper, to taste. The mixture should be workable but dry. Form potatoes into tots.

Heat vegetable oil in a large stockpot or Dutch oven over medium heat. Add tots (don't crowd the pan) and cook until evenly golden and crispy, about 3-4 minutes. Transfer to a paper towel-lined plate. Sprinkle with some more salt and then serve immediately.*

*TO FREEZE: Transfer cooled tater tots to an airtight container. Freeze up to 1 month. To bake, preheat oven to 400 and bake until heated through, about 15-17 minutes.