Cooking Recipe For All

Get all Item Recipes is Here

Breaking

Tuesday, July 18, 2017

July 18, 2017

Philly Cheesesteak One Pot Pasta


I grew up, and still live, about 45 minutes outside of Philly so I know a thing or two about cheesesteaks. And I'm sure purists would balk at one of the most popular posts on my blog, these Philly Cheesesteak Sloppy Joes that I adapted from Rachael Ray, as well as this amazing one pot recipe for Philly Cheesesteak One Pot Pasta. That's their loss. All the busy parents I know love having one post pasta recipes in their back pocket for those busy weeknights and this one is a real winner.
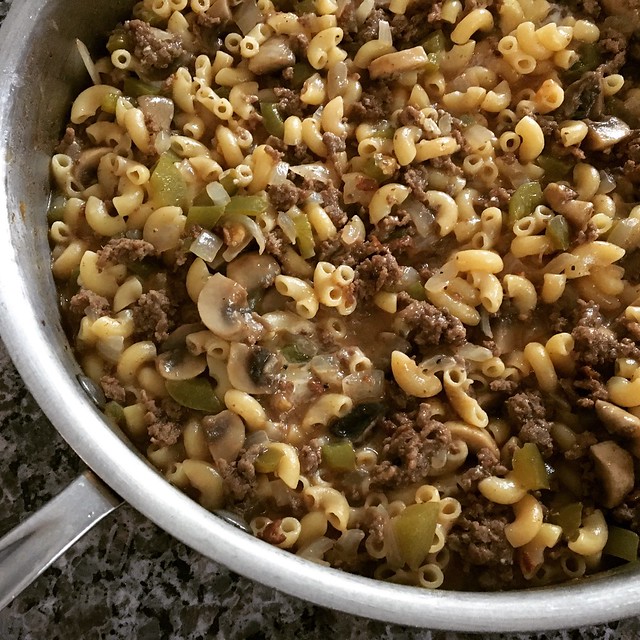
Philly cheesesteak pasta

I made a few slight modifications from my friend Melissa's take on the recipe - I added flour to tighten up the sauce and swapped the cheese because I'm just not a huge fan of provolone when it's the only cheese. I also left off the parsley.

There's not much more to say except we'll be enjoying this one often.

Philly Cheesesteak One Pot Pasta
Slightly Modified from Hunt, Cook, Eat

1 pound ground beef
1 large sweet onion, diced
1 large green bell pepper, diced
12 ounces button mushrooms, chopped
1/4 cup flour
2 tablespoons ketchup
1 tablespoon Worcestershire sauce
1 teaspoon kosher salt
1 teaspoon fresh ground black pepper
1 quart beef or chicken broth
8oz elbow macaroni
4oz provolone cheese, shredded (or 3oz cheddar plus 1oz American cheeses, shredded)

Heat a large, deep skillet with a tight-fitting lid over medium high heat. Add the ground beef and cook until a brown crust starts to form before breaking the beef apart with the back of a wooden spoon.

Add the onions, green pepper and mushrooms. Cook for 4-5 minutes, stirring often, until the vegetables are soft and the mushrooms have released their liquid. Add the flour and stir to incorporate it.

Add the broth, ketchup, Worcestershire sauce, salt and black pepper and stir to combine. Bring to a boil, then add the macaroni. Cover and cook for 5-7 minutes or until noodles are just barely al dente, stirring once halfway through to make sure the pasta isn't sticking.

Remove the lid, reduce the heat to medium and simmer for another 5 minutes to thicken. Turn off the heat, then add the cheese. Stir until all the cheese melts. Let sit for another few minutes, then serve.

Tuesday, July 11, 2017

July 11, 2017

{Product Review} Chef Remi Cheese Grater


The nice folks over at Chef Remi recently contacted me about doing some product reviews. I love kitchen tools so I was quite excited to receive the Chef Remi Cheese Grater. According to the product page:
  • It grates both hard and soft cheese such as Parmesan, Cheddar, Monterey Jack, and more.
  • You can also use the grater for vegetables like cucumber, cabbage, carrots, cauliflower, onion, potato, and zucchini.
  • Or use the fine blades as a zester for oranges or lemons, as well as coconut, chocolate, nuts, ginger, garlic, and other spices.
Chef Remi cheese grater

I was very excited to give it a try with mozzarella cheese. I grate a lot of mozzarella cheese, especially in the cooler months when I make homemade pizza every Friday. The nonslip surface, and the fact that I can hold the grater flat while grating the cheese were huge selling points for me. I hate my old box grater that would always slip because you had to hold it vertically.

Chef Remi cheese grater

Grating the mozzarella was pretty easy. The surface area of the grater is not quite as large as I'd like - a few pieces of cheese made a break for it off the sides - but I absolutely loved how sturdy it was on my prep table.

Chef Remi cheese grater

So far I've only tried grating mozzarella, which can be a little flaky:

Chef Remi cheese grater

I'd recommend having a small bowl nearby, or grating on top of a clean surface, so you can use any cheese that ends up on top of the grater. 

Chef Remi cheese grater

Most of the cheese did end up in the container base, that comes with a snap-on lid. I grated this cheese yesterday for tonight's dinner. The whole thing is dishwasher safe, too, which I'm sure is great for people with a functioning dishwasher (I'm, sadly, not one of them).

Overall I'm very happy with this grater. And you can't beat the price, which is currently $10! They're also offering 15% off your order right now and they always offer free shipping (woohoo!).

Disclaimer: Chef Remi sent me the cheese grater to try at no cost, but all opinions are my own.

Monday, July 3, 2017

July 03, 2017

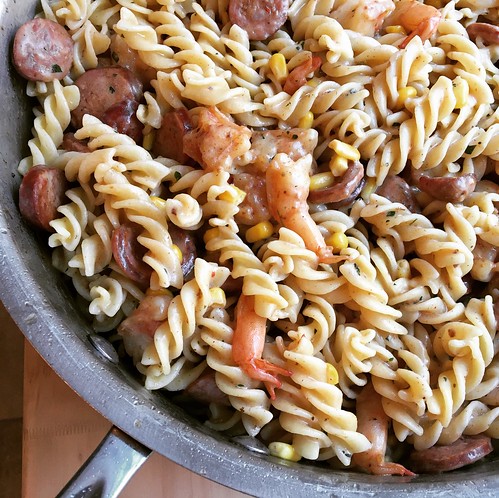
Creamy Shrimp Boil Pasta


I love the idea of a shrimp boil when we're down the shore, but on a weeknight I need something quicker, easier and less messy. That's where this Creamy Shrimp Boil Pasta comes in. All the flavors of a classic shrimp boil served with pasta instead of potatoes.

Shrimp boil pasta

I lightened it up a bit by subbing half-and-half for the heavy cream. As I was making the sauce I realized the cream/half-and-half isn't even necessary. It was a nice treat, but I think the pasta could stand alone with the other ingredients. Totally your call. We also thought it needed more corn, so I upped the amount in the recipe below. This was so delicious and easy to make on a busy summer weeknight.

Creamy Shrimp Boil Pasta
As seen on Damn Delicious

1 pound cavatappi or rotini pasta
1 tablespoon olive oil
1 (12.8-ounce) package smoked andouille sausage, thinly sliced
1 pound shrimp, peeled and deveined (my shrimp were larger so I cut them in half)
3 teaspoons Old Bay seasoning, divided
4 tablespoons unsalted butter
4 cloves garlic, minced
2 tablespoons flour
1 cup chicken broth, plus more as needed
1/2 cup half-and-half
1/4 cup freshly grated Parmesan
1 teaspoon minced fresh thyme
Kosher salt and freshly ground black pepper, to taste
1 1/2-2 cups frozen corn kernels
2 tablespoons chopped fresh chives (optional)

Cook pasta according to package directions. Save 1 cup of the cooking water, then drain well.

Heat the olive oil in a large skillet over medium high heat. Add the sausage and cook, stirring frequently, until sausage is lightly browned, about 3-4 minutes. Place the sausage in a large bowl and set aside.

Season the shrimp with 1 1/2 teaspoons of Old Bay seasoning. Add the shrimp to the skillet and cook until pink, about 2-3 minutes. Remove from the pan to the same bowl as the sausage.

Melt the butter in the skillet. Add the garlic and cook, stirring frequently, until fragrant, about 1-2 minutes. Whisk in the flour and cook for 1 minute. Gradually whisk in the chicken broth, half-and-half, Parmesan, thyme and remaining 1 1/2 teaspoons Old Bay. Cook until slightly thickened, about 2-3 minutes. If the mixture is too thick, add more broth as needed. Season with salt and pepper, to taste.

Stir in the pasta, sausage, shrimp and corn. Toss to combine. Thin with some of the pasta cooking water, if needed. Serve immediately, garnished with chives, if desired.

Monday, June 26, 2017

June 26, 2017

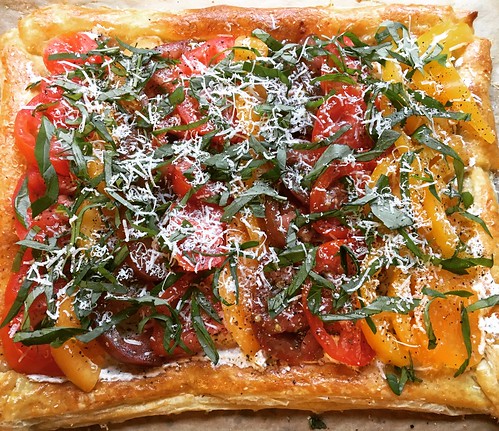
Tomato and Goat Cheese Tart


Do you ever see a recipe and just know, instinctively, that it's going to be amazingly delicious? That's how I felt when I read my friend Kylee's post about this Tomato and Goat Cheese Tart . I could practically taste the buttery, flaky crust, the ripe, juicy tomatoes and the tang of the goat cheese. I couldn't wait to make it.

Goat cheese and tomato tart

I tried to find the Nature Sweet tomatoes Kylee mentions in her post (Eclipse tomatoes), but the stores near me don't seem to carry them (despite the Nature Sweet site claiming they did). I ended up splurging on heirloom tomatoes and I'm so glad I did. All I can say is wow. I'm lucky to live in an area known for amazing tomatoes, but it's not quite peak season yet. The heirlooms I picked up were stunning and really brought the whole tart together.

Katie helped me mix up the goat cheese spread the day before and then I assembled and baked the tart at my parent's house. We ate it as an app and holy guacamole was it delicious. Everything comes together beautifully and we were all sad when it was gone. My aunt is coming for a visit this weekend and since a pack of puff pastry comes with two sheets I'll be using her visit as an excuse to make this again. It's the perfect summer treat since you really want to make this when tomatoes are at their best. The only downside is that this wouldn't reheat well, so plan to devour the whole thing in one sitting. Maybe that's not such a bad thing...

Tomato & Goat Cheese Tart
Slightly modified from Kylee Cooks

1 puff pastry sheet, thawed in the fridge
1 egg, beaten
Grated Parmesan or Pecorino cheese
4 oz goat cheese, softened (a small log, the ones in my supermarket are 4oz)
1 clove garlic, grated
1 teaspoon dried Italian seasoning
4 heirloom tomatoes, sliced then cut into half-moons
1/2 cup fresh basil, chopped roughly
Salt & pepper

Preheat the oven to 425.

Place the sheet of puff pastry on a piece of parchment laid on a pizza stone or baking sheet. Use a rolling pin to gently flatten and spread out the pastry so it's smooth as well as longer and wider than when you started.

Using a sharp knife, cut a 1/2-inch strip off the pastry on all four sides. Keep the strips - you'll be adding them back onto the pastry in a minute. Brush all the pastry with the beaten egg, then put each strip you just cut back onto the dough, essentially making a border around the edges (Katie said it looked like a picture frame). Use the tines of a fork to press the strips down so they stick to the pastry underneath. Prick the entire surface (where the picture would go) with a fork. Sprinkle with some Parmesan or Pecorino cheese.

Bake for 15 minutes until puffed and golden.

Mix together the goat cheese, garlic and Italian seasoning. This can be done a day or two ahead of time. Once the puff pastry is golden brown, remove it from the oven. Spread the goat cheese mixture over the center area of the pastry (now you'll really see what Katie meant by it looking like a picture frame).

Top the goat cheese with slices of tomato. I bought different colored heirlooms so I alternated the colors to make it look pretty. Keep the tomato slices close together - you really want to pack them on for maximum flavor. Sprinkle the chopped basil and extra Parmesan or Pecorino cheese on top, then season with a little salt and pepper. Cut the tart into slices and serve.

Thursday, June 22, 2017

June 22, 2017

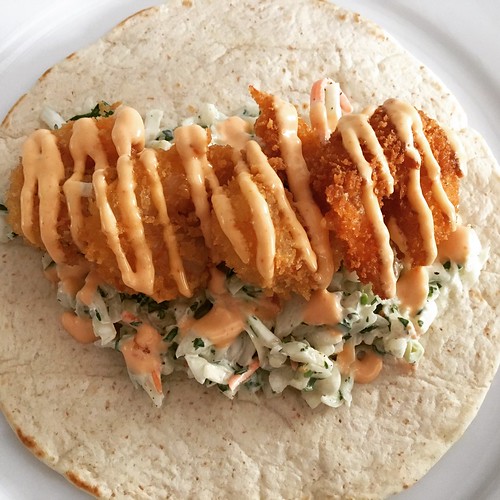
Crispy Shrimp Tacos with Cilantro-Lime Slaw


Wow, wow, WOW!! What a showstopper. As soon as I saw Caroline post this recipe for Crispy Shrimp Tacos with Cilantro-Lime Slaw I had a feeling they'd be good, but I wasn't expecting them to be amazing.

Crispy shrimp tacos

The ingredients are actually very simple and there's almost no prep work. The shrimp take next to no time to cook and the result is a wonderful medley of textures - crispy shrimp, creamy slaw, slightly chewy tortilla combined with the heat of the Sriracha mayo. Steve and I added extra Sriracha to our tacos because I can't use too much spice or Katie complains. The only thing that would make these better is buttery slices of avocado nestled next to the shrimp, so I included that in the recipe below.

Make these soon! I know I'll be putting them on the menu again ASAP.

Crispy Shrimp Tacos with Cilantro-Lime Slaw
Slightly modified from The Barbee Housewife

Cilantro-Lime Slaw:
2 cups coleslaw mix
1/4 cup mayonnaise (or to taste, I eyeballed it)
Juice of 1 lime
salt and pepper
1/4 cup fresh cilantro, chopped

Sriracha-Lime Sauce:
1/4 cup mayonnaise
Sriracha, to taste
Juice of half a lime

Crispy Shrimp:
1 lb. shrimp, peeled and deveined
1/2 cup flour
salt and pepper
2 eggs, whisked
1 cup panko
Vegetable oil, for frying

To serve:
Flour tortillas, warmed in a dry skillet
Sliced avocado

Combine the coleslaw mix, mayonnaise, lime juice, salt and pepper and cilantro in a bowl. Cover and refrigerate until ready to use.

Stir the mayonnaise, Sriracha and lime juice together. Taste and adjust the heat to your preference. Cover and refrigerate until ready to use.

Put the flour, along with some salt and pepper, in a plastic food storage bag. Whisk the eggs in a shallow bowl. Put the panko in another food storage bag. Place the shrimp in the bag with the flour first. Seal the bag, then toss to coat all the shrimp with the flour. Remove the shrimp from the bag, shaking off any excess flour (I like to use a colander for this), then place them in the bowl with the egg. Toss to coat all the shrimp with the egg. Add the shrimp to the bag with the panko, seal the bag and toss to coat all the shrimp with the panko.

Heat 2-3 inches of vegetable oil over medium heat in a large skillet. Put the shrimp in the pan, being careful not to overcrowd them, and cook for about 2 minutes, until the panko is nicely browned. Remove the shrimp to a paper-towel lined plate.

Build your taco starting with some of the slaw, a few shrimp, and a drizzle of the Sriracha-lime sauce. Nestle a few slices of avocado alongside the shrimp and enjoy!

Thursday, June 1, 2017

June 01, 2017

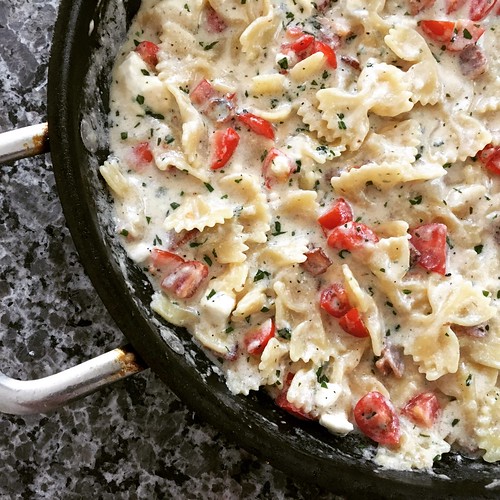
One-Pot Bacon and Feta Pasta


One-pot meals are amazing, right? I know they're so 2015, but what busy family doesn't love a meal that combines minimal effort with maximum flavor? Ashley's recipe for One-Pot Chicken Feta Alfredo sounded perfect for a busy weeknight.

One pot pasta

I decided to make a few changes to the recipe - I left out the chicken, swapped the pancetta for bacon (although my family LOVES pancetta) and left the tomatoes and basil as a garnish rather than cooking them with the pasta (because I simply cannot stand loose tomato skin - blech).

The result was a creamy, cheesy, simply delicious and EASY weeknight meal. This is absolutely going in the permanent rotation, although I'll need to double it next time if we want leftovers.

One-Pot Bacon and Feta Pasta
Modified from Cheesecurd in Paradise

4 slices of bacon, cut into pieces (I like to use kitchen shears)
8 oz bow tie pasta
6 oz crumbled feta, divided
1 1/2 cups shredded Parmesan cheese
2 cups reduced sodium chicken broth
1 cup half-and-half
1/4 teaspoon garlic powder
1 tablespoon minced fresh basil
2 tomatoes, chopped

In a large non-stick skillet with a lid, cook the bacon until it's crispy. If there's a lot of fat, drain most of it off. Add the pasta, 4 oz of the feta, Parmesan, chicken broth, half-and-half and garlic powder.

Bring to a boil, then cover and reduce to a simmer. Cook for 15-20 minutes, just until the pasta is al dente (with a little bite left).

Add the basil, tomatoes and remaining 2 oz of feta. Stir to combine and let sit for 5 minutes before serving.

Friday, May 26, 2017

May 26, 2017

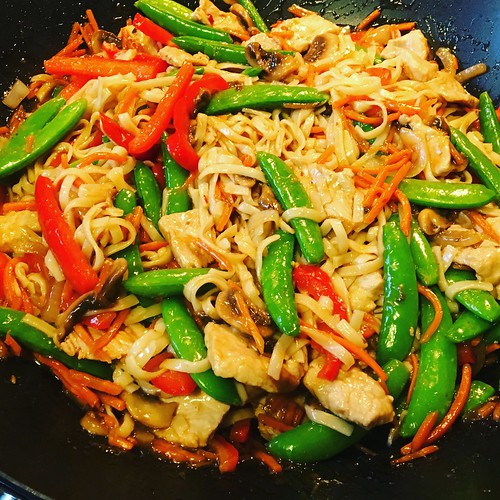
Pork and Vegetable Stir Fry

I used to make stir fries all the time and then I just...stopped. I have no clue why. Maybe we got burnt out on them or maybe they just fell off my radar the way things do when you're a food blogger who's always trying to make something new so you have content to blog. Whatever the reason, it's been a very long time since I made a stir fry.

Pork stir fry with udon noodles

While meal planning last week I found a recipe for Pork “Lo Mein” Ramen that I'd printed from my friend Katie's blog. It sounded easy, which I really need these days. I had two pork chops in the freezer to use up, and veggies are amazing right now, so I was psyched. While looking up ramen on Wegman's website, to see how many ounces of noodles are in a package, I discovered that ramen isn't safe for someone with a nut allergy. Who knew? Poor kid will never know that particular joy of college dorm life. This meant finding a different, safe noodle. I ended up getting these udon noodles and the texture was perfect - silky smooth, with a nice chew.

I figured one pack of udon noodles was equal to four packs of ramen, so I doubled the original recipe, which was perfect. It seemed like a lot of food but we were all so in love with this recipe we went back for seconds and there are barely any leftovers. Thanks for an amazing recipe, Katie, and for helping me rediscover my love of stir fries!

Pork and Vegetable Stir Fry
Adapted from So Tasty, So Yummy

2 tablespoons cornstarch
1 teaspoon chile garlic sauce
1/4 cup soy sauce
1 tablespoon oyster sauce
1 cup chicken broth
1 12-oz package udon noodles
2 tablespoons canola oil, divided
1 pound pork loin chops, sliced thin
1 tablespoon grated fresh ginger
2 cloves garlic, minced
1 small onion, thinly sliced
1/2 pound mushrooms, sliced
1 small red bell pepper, sliced thin
1 cup shredded carrots
1 8oz bag snow or snap peas
1 teaspoon sesame oil

In a two cup measuring cup, whisk together the cornstarch, chile garlic sauce, soy sauce, oyster sauce and chicken broth.

Cook the udon noodles according to the package instructions. Drain and set aside.

Heat 1 tablespoon of the oil in a large skillet or wok over medium-high heat. Stir fry the pork, ginger and garlic until almost cooked through. Remove the pork from the wok and add the remaining tablespoon of oil. Once the oil is hot, add the onion, mushrooms, bell pepper and carrots. Stir fry for 3 to 5 minutes, until the veggies start to soften.

Pour the broth mixture over the vegetables, bring to a boil and cook for a minute more. Add the pork and snow or snap peas. Cook for another minute, then add the udon noodles and sesame oil. Toss to coat the noodles evenly with the sauce. Serve.

Friday, May 19, 2017

May 19, 2017

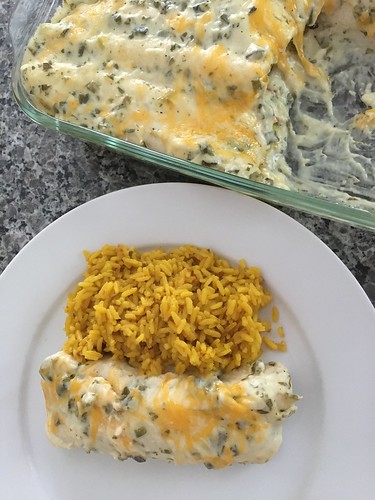
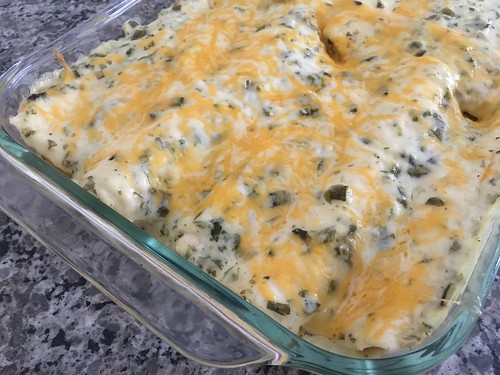
Shrimp Enchiladas with Sour Cream Poblano Sauce

For some reason I got it into my head that I wanted shrimp enchiladas. Mind you, I've never once ordered shrimp enchiladas at a Mexican restaurant so I can't for the life of me figure out where the craving came from. But there it was and so off I went to find the perfect recipe.

Shrimp enchiladas

I ended up combining recipes from two of my favorite bloggers and the results were sensational. A word of warning, though - these are a wee bit time consuming for a weeknight. There's nothing complicated about the recipe, it's just a lot to put together between peeling and roasting the shrimp, roasting the poblanos, making the sauce, and cooking the filling. Work has been insane so I've been trying to do dinner prep either early in the morning or late at night. I highly recommend cooking all the components ahead of time. Then you can assemble the enchiladas right before you bake them.

Shrimp enchiladas

Shrimp Enchiladas with Sour Cream Poblano Sauce
From Damn Delicious and Annie's Eats

1 pound medium shrimp, peeled and deveined
2 tablespoons olive oil, divided
Kosher salt and freshly ground black pepper, to taste
1 onion, diced
3 cups coleslaw mix
3 cups baby spinach
1 tablespoons chipotle pepper, in adobo sauce
1/4 teaspoon dried oregano
12 (6-inch) corn or flour tortillas
2 cups shredded Monterey Jack or Mexican cheese

For the sauce:
2 poblano peppers
2 tablespoons butter
2 tablespoons flour
1 1/2 cups chicken broth
1/2 teaspoon garlic powder
Salt and pepper, to taste
3/4 cup sour cream
1/4 cup chopped fresh cilantro

Preheat oven to 400. Place shrimp onto a baking sheet. Add 1 tablespoon olive oil, salt and pepper, and gently toss to combine. Place into oven and roast just until pink, firm and cooked through, about 6 minutes. Remove from oven and let cool before dicing into bite-size pieces. Reduce oven temperature to 375.

Heat remaining 1 tablespoon olive oil in a large skillet. Add onion and cook until the onions become translucent, about 5 minutes. Add coleslaw mix, spinach, chipotle pepper, and oregano. Season with salt and pepper. Cook, stirring occasionally, until the spinach just begins to wilt, about 1-2 minutes. Add shrimp and gently toss to combine.

If you have a gas stove, place the peppers directly on the burner over the flame and roast, turning often, until the skin is blistered and black all over. If you have an electric stove, preheat the oven to 475˚ F. Place the peppers in a baking dish. Bake, turning every 6-8 minutes or so, until the skin is blistered over most of the surface about 20-25 minutes total. Transfer the peppers to a bowl, cover with a plate or plastic wrap and let sit 15 minutes. When cool enough to handle, peel away the skin, stem, seeds and ribs and discard. Coarsely chop the peppers and set aside.

To make the sauce, melt the butter in a medium saucepan. Stir in the chopped poblanos. Sprinkle in the flour and stir, cooking briefly just until golden, about 1-2 minutes. Whisk in the broth and garlic powder. Season with salt and pepper to taste. Let cook over medium heat, stirring frequently, until the mixture bubbles and thickens. Remove from the heat and stir in the sour cream and cilantro.

To assemble the enchiladas, spoon half the sauce over the bottom of a 9x13" baking dish. Lay one tortilla on a flat surface and add some of the cheese, along with some of the shrimp mixture to the center. Roll the tortilla and place seam side down onto prepared baking dish. Repeat with remaining tortillas and shrimp mixture. Pour the rest of the sauce evenly over the top and cover with the remaining cheese. Place into oven and bake, covered, until lightly golden and bubbly, about 20 minutes.

Monday, May 15, 2017

May 15, 2017

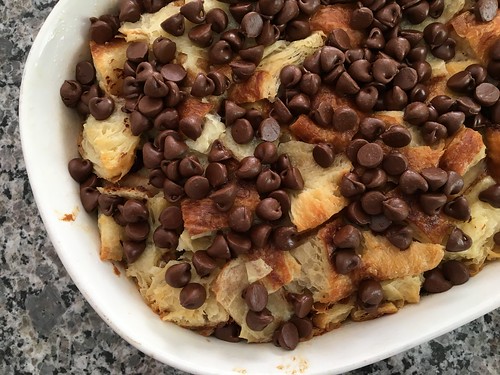
Chocolate Chip Croissant Bread Pudding

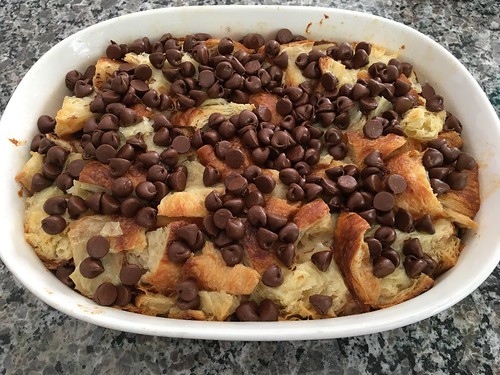
You guys. This chocolate chip croissant bread pudding is Ah-May-Zing. Utterly and completely decadent and worth every calorie.

Chocolate chip bread pudding

I was looking through my recipes for something to make for Mother's Day dessert when I stumbled upon this recipe from Fake Ginger I'd printed a while back. You probably don't know this about me, but I'm a sucker for a chocolate croissant. I used to get them from my college bakery all the time. I'd ask them to heat it up to slightly melt the chocolate in the middle. What I appreciated the most was that the chocolate actually went from edge to edge, not like some bakeries where there's maybe 1 tablespoon of chocolate inside. This recipe is basically turning my beloved chocolate croissant into a shareable dessert!

Chocolate chip bread pudding

After reading the directions I decided to skip slicing and toasting the croissants. Bite-sized pieces are more traditional for bread pudding and toasting seemed completely unnecessary. The result was fantastic. Some of the bread pudding was ooey and gooey, other bites were crispy. It was the perfect blend of textures. We were all oohing and ahhing as we ate and I'm already dreaming about the leftovers in the fridge.

Chocolate Chip Croissant Bread Pudding
Slightly modified from Fake Ginger

4 tablespoons unsalted butter, melted and cooled slightly
3 large eggs
1 cup milk
1 cup heavy cream
1/4 cup sugar
1 teaspoon vanilla
1/4 teaspoon salt
6 croissants, torn or cut into pieces
1 1/2 cups milk chocolate chips

Preheat oven to 350F. Grease a 2-quart baking dish.

Whisk together the melted butter, eggs, milk, heavy cream, sugar, vanilla, and salt. Place half the croissant pieces in a 2-quart baking dish. Sprinkle about 2/3 of the chocolate chips over them and then top with remaining pieces of croissant.

Pour the egg mixture over top, pressing down gently to make sure most of the croissants are covered. You don't want all the pieces completely submerged.

Cover with foil and bake for 30 minutes. Uncover, sprinkle the remaining chocolate chips on top and bake until golden brown, 15-20 minutes more.

Let sit for 15 minutes before serving.

Tuesday, May 9, 2017

May 09, 2017

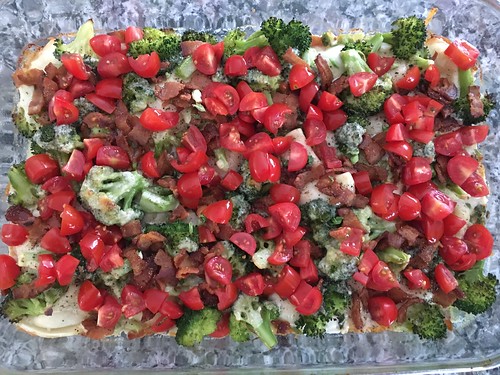
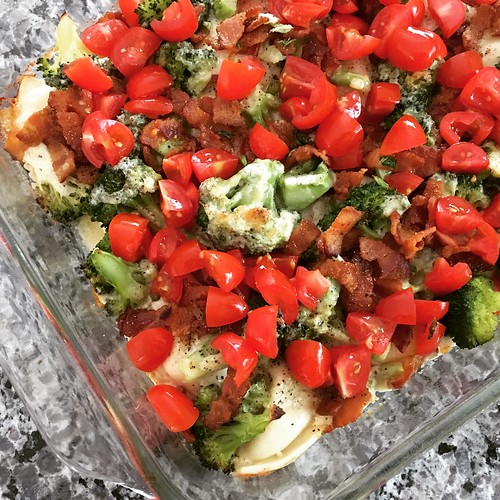
Bacon Broccoli Pierogie Bake

Bacon broccoli pierogie bake

I've been making this recipe for Bacon Broccoli Pierogie Bake for years but apparently I only blogged it as Bacon Pierogie Bake (served with a side of steamed broccoli) or Broccoli Pierogie Bake (back when I was trying to eat less meat). Since I only make it this way now - gotta love one-pot meals - I figured I better make a new post so I could share it with all of you.

Bacon broccoli pierogie bake

Lately I've been buying mini pierogies (because they're just so darn cute) and doubling the recipe so we have plenty left over for lunch the next day. The doubled recipe is below.

Bacon Broccoli Pierogie Bake
Slightly Adapted from Elizabeth's Edible Experience

2 large broccoli crowns, cut into florets
Cooking spray
2 (16-ounce) packages frozen mini potato pierogies
6-8 center-cut bacon slices, chopped
6 ounces cream cheese
1/2 teaspoon garlic powder
salt and pepper
1 cup chicken broth
4 ounces sharp cheddar cheese, shredded
3-4 thinly sliced scallions
1/2 cup chopped seeded plum tomato

Preheat oven to 400°.

Steam broccoli until tender. Coat a 9 x 13" baking dish with cooking spray. Arrange the broccoli and frozen pierogies in the dish.

Cook the bacon in a saucepan over medium heat until crisp; remove to a paper towel-lined plate.

Add the cream cheese, garlic powder, salt and pepper to the bacon drippings and cook until cream cheese begins to melt, stirring frequently. Gradually add the chicken broth, whisking until smooth. Pour the cream cheese mixture evenly over the pierogies and top with the cheddar cheese.

Bake for 20 minutes, then remove from the oven and add the bacon and scallions. Bake for another 5 minutes. Remove from the oven and top with the tomato. Allow to cool for 5 minutes then serve.

MAKE AHEAD TIP: You can steam the broccoli, cook the bacon, shred the cheese, chop the scallions and tomatoes and make the sauce ahead of time. Store everything in separate containers in the fridge until you're ready to assemble the casserole.