Cooking Recipe For All

Get all Item Recipes is Here

Breaking

Friday, July 15, 2016

July 15, 2016

Szechuan Pork with Bok Choy

I love a good stir fry. Not only are they quick and easy to prepare, they're the perfect way to get protein and veggies in one dish. Serve over rice or toss with cooked pasta and dinner is done.
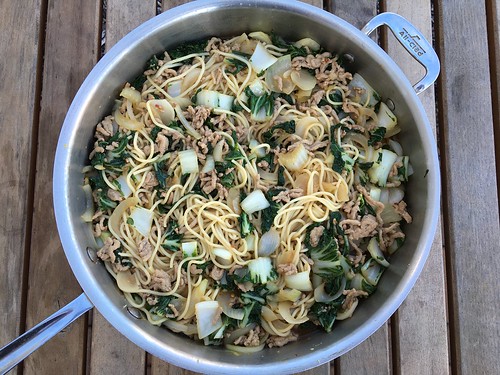
Szechuan pork with bok choy

My friend Mary Ellen recently posted this recipe for Szechuan Pork with Bok Choy. I immediately put it on the menu. Unfortunately, my grocery store didn't have the large heads of bok choy so I guessimated the number of baby bok choy I'd need as a substitute. I was way, way off. The bok choy all but dissolved in the sauce and Steve said he would never have known it was in there if I hadn't told him. Cooking fail.

I vowed to try again and this time, I looked up bok choy on Wegmans' website. I really love that their site lists their products as well as where you can find them in the store. I saw that a large head of bok choy weighs in at 1 1/2-lbs, so I told Steve to buy 1 1/2-lbs of baby bok choy. Problem solved! I remade the dish and this time, there was plenty of that crunchy goodness.
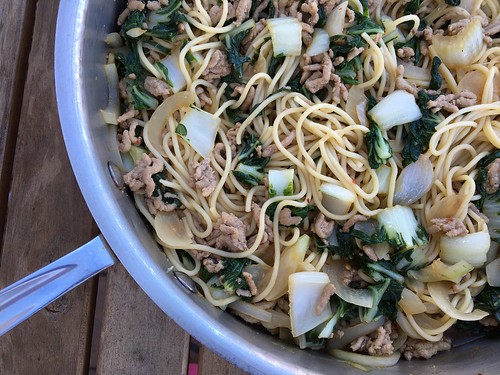
Szechuan pork with bok choy

This is such a simple meal that's packed with flavor. I love how the pork and vegetables stretch 8-oz of pasta into 5 meals and how quickly I was able to get this meal on the table. Thanks for another delicious dinner, Mary Ellen!

Szechuan Pork with Bok Choy
Slightly modified from Mary Ellen's Cooking Creations, originally from Rachael Ray

1 1/2-lbs baby bok choy
2 tablespoons sesame oil, divided
1 small onion, thinly sliced
4 cloves garlic, minced
1 tablespoon fresh ginger, grated
1 lb ground pork
1/3 cup soy sauce
1 teaspoon chile garlic sauce (more or less to taste)
1 cup chicken broth
8 spaghetti, cooked and drained
4 scallions, chopped

Cut off the bottom stem of each baby bok choy and discard any yellowing outer leaves. Chop the remaining bok choy into large chunks.

Heat 1 tablespoon of the sesame oil in a large skillet over medium high heat. Add the bok choy, onion, garlic and ginger. Cook, stirring occasionally, until the onions and bok choy start to soften, about 5 minutes. Remove the vegetable mixture to a bowl and return the skillet to the stove.

Add the remaining 1 tablespoon of sesame oil to the pan, then add the pork. Cook, breaking the pork up with your spoon, until browned.

Add the soy sauce, chile garlic sauce and chicken broth to the pan. Bring to a simmer, then add the vegetables. Simmer together for a few minutes, then add in the cooked noodles and scallions. Toss together and serve.

Friday, July 8, 2016

July 08, 2016

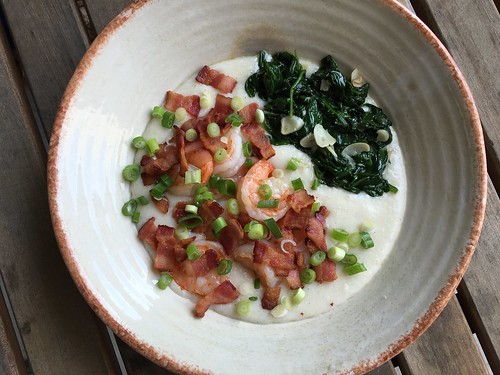
The Best Shrimp and Grits

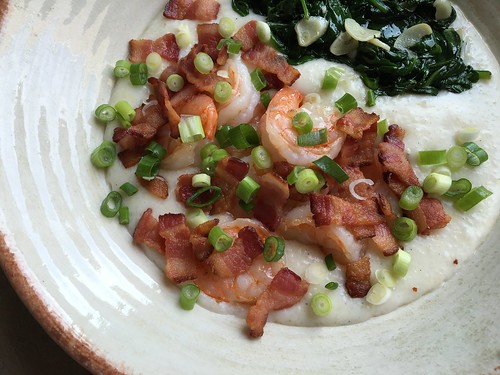
I'm a sucker for shrimp and grits. If I see it on a menu, I have to order it. I just love the creamy, soft grits topped with the bursty, delicious shrimp. I've tried making it at home a few times, but wasn't successful. Now my search is over - I've found THE BEST recipe for shrimp and grits. This was Katie's first time eating grits and she literally licked her plate clean. Steve couldn't stop raving about it either. We were all silent as we ate, each of us savoring the delicious plate of food in front of us.

Shrimp and grits

The recipe could not be simpler - grits are cooked in a mixture of chicken broth, milk and butter. Aside from stirring them every once in a while, they cook themselves. Shrimp are cooked in delicious bacon fat with a little garlic. The whole thing takes less than 30 minutes to prepare, making it the perfect weeknight meal.

Shrimp and grits

I served the shrimp and grits with spinach sauteed in oil with some sliced garlic. It was the perfect accompaniment, especially since I could just plate it alongside the shrimp. The only thing I might do is add a little fresh chopped tomato - not because the dish needs anything but for that hint of freshness and acidity.

The Best Shrimp and Grits
As seen on The Redhead Baker, originally from Taste of Home

For the grits:
2 cups chicken broth
2 cups milk
4 tablespoons unsalted butter, cubed
3/4 teaspoon salt
1/2 teaspoon freshly ground black pepper
3/4 cup uncooked stone-ground/old-fashioned grits
1 cup (4 ounces) shredded extra sharp cheddar cheese

For the shrimp:
6 thick-sliced bacon strips, chopped
1 pound uncooked shrimp, peeled and deveined
3 garlic cloves, minced
4 scallions, thinly sliced

Combine the broth, milk, butter, salt and pepper in a large saucepan over medium-high heat and bring to a boil. Slowly whisk in the grits. Reduce the heat to low and cover. Cook for 20 minutes, stirring occasionally. Add the shredded cheese and stir until melted. Set aside covered, and keep warm.

In a large skillet, cook the bacon over medium heat until crisp. Remove to a paper towel-lined plate with a slotted spoon; reserve drippings in the skillet.

Saute the shrimp and garlic in the bacon drippings. Flip the shrimp as soon as they turn pink. Remove once both sides are pink.

To serve, divide the grits into four bowls. Top each with one quarter of the shrimp. Garnish with the reserved bacon and scallions.

Friday, June 10, 2016

June 10, 2016

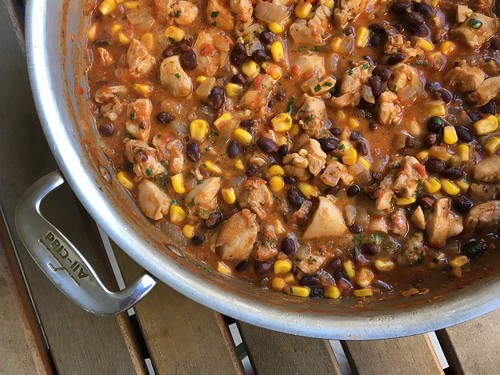
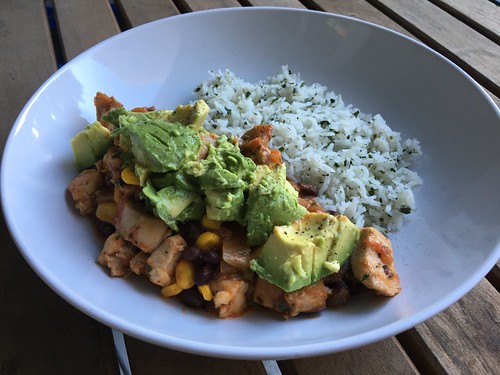
Skillet Salsa Chicken with Cilantro Lime Rice

Like most people, I'm a big fan of easy weeknight meals. Obviously I love to cook or I wouldn't have a food blog, but even I have nights where I just don't feel like cooking. That's when a meal like this Skillet Salsa Chicken with Cilantro Lime Rice comes in handy.

Salsa chicken with cilantro lime rice

I've seen recipes for salsa chicken floating around the Internet for years, but they all seem to involve the slow cooker, which I don't use. That's why I was so excited when my friend, Melissa, posted this recipe. A skillet salsa chicken was right up my alley and I knew it would pair beautifully with cilantro lime rice.

Salsa chicken with cilantro lime rice

What a show-stopper. Katie isn't a picky eater and loves pretty much everything I make, but she couldn't stop raving about this one. After every bite she said some variation of, "Mommy, you are an amazing cooker. I'm so lucky to have you cook for me. Can you make this again soon?" I was right there with her, practically swooning over the delicious flavors, especially when I mixed the rice and chicken together with the creamy avocado. Yum, yum, yum.

And the best part - dinner took almost no time to make so we could play after dinner. That's a win-win in my book.

Skillet Salsa Chicken with Cilantro Lime Rice
Slightly adapted from Hunt, Cook, Eat

1-1/4 pounds boneless skinless chicken thighs, cut into bite sized pieces
1 medium sweet onion, finely chopped
2 cloves garlic, minced (or 1 teaspoon garlic powder)
1 teaspoon cumin
1 teaspoon oregano
1 teaspoon chile powder
1 teaspoon salt
2 cups salsa
1 cup chicken stock or water
1 cup corn kernels
1 can black beans, drained and rinsed
2 tablespoons sour cream
1 tablespoon lime juice
Chopped fresh cilantro, for garnish

1 cup dry basmati rice
1 1/2 tablespoons lime juice
1 teaspoon vegetable oil
2 tablespoons fresh chopped cilantro
1/4 teaspoon salt

Diced avocado, for serving

Heat a large skillet over medium high heat with just a touch of olive oil. Add the chicken and cook for 4-5 minutes until no longer pink. Add the onion and saute for another 2-3 minutes until onion is soft and chicken is cooked through. Add minced garlic (if using) and stir for 30 seconds until fragrant. Add the seasonings, salsa, water, corn and black beans to the pan and stir to combine.

Turn the heat down to medium low and simmer for 10 minutes. Remove the pan from the heat and stir in the sour cream and lime juice. Sprinkle with fresh cilantro.

To make the rice, follow the directions on the package. My basmati calls for soaking the rice beforehand (which I highly recommend). Once you've cooked the rice, drizzle the lime juice and oil over the top while it's still warm. Sprinkle with 2 tablespoons chopped cilantro and salt, then fluff with a fork.

To serve, pile some rice in a shallow bowl and top with some of the chicken. Add diced avocado and serve.

Thursday, June 9, 2016

June 09, 2016

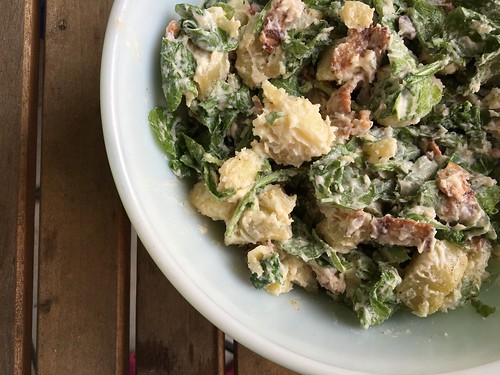
Bacon, Parmesan & Arugula Potato Salad

Sometimes the best things come into your life when you least expect them. Take this Bacon, Parmesan & Arugula Potato Salad. I wasn't looking for a new potato salad recipe, but as soon as I saw Kylee's post I just had to make it. And I'm really glad I did because we all absolutely loved it.

Potato salad with bacon arugula parm

I halved the recipe (the full amounts are listed below) and it was more than enough for the three of us. I brought the leftovers on a picnic the following day to share with friends and they raved, too. The best part is, it's super easy and incredibly flavorful.

Bacon, Parmesan & Arugula Potato Salad
Slightly modified from Kylee Cooks

3 lbs Yukon gold potatoes, peeled and cubed
1 teaspoon salt
1 lb bacon
1 5-oz bag arugula
mayonnaise
Shaved or grated Parmesan or Pecorino cheese
Freshly ground black pepper

Place potatoes in a large pot of cold water covering them by 1-inch. Bring to a boil over high heat and add salt. Reduce heat to medium-low and simmer for 10 minutes, until the potatoes are tender. Don't overcook them or they'll get mushy!

Meanwhile, cut the bacon into pieces using kitchen scissors. Cook it in a pan until crispy, then drain on a paper towel. Reserve the bacon grease in the pan.

Once the potatoes have cooked, drain them and immediately toss with the reserved bacon fat. Drain again and spread out on rimmed baking sheet. Refrigerate until cooled, about 30 minutes.

Mix the cooled potatoes, bacon, arugula, mayonnaise, Parmesan, and pepper together. Taste and adjust seasonings and mayo as needed.


Tuesday, June 7, 2016

June 07, 2016

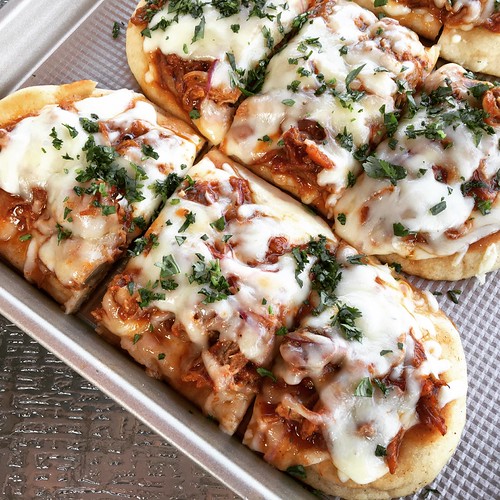
Pulled Pork Flatbread Pizzas

The last time Steve made pulled pork, we had some left over. I'd had this idea of making flatbread pizzas in the back of my mind for a while, so I squirreled it away in the freezer for another time. That time finally came last week. I even had some leftover BBQ from our favorite spot, Sweet Lucy's in Philly.

Pulled pork pizzas

I wasn't planning to blog these, but I posted photos on my personal Facebook page and on Instagram. I had a few people ask me for the recipe, so I promised I'd throw this blog post together. This is more of a method than a recipe. I don't have measurements and I've never blogged the pulled pork recipe Steve uses, so I hope what little I've got for you guys below will work for those who asked!

Pulled Pork Flatbread Pizzas

Butter
6 flatbreads or naan
Leftover pulled pork
Your favorite BBQ sauce
Grated Monterey Jack cheese
Grated mozzarella cheese
Thinly sliced red onion
Fresh cilantro, minced

Preheat the oven to 350 degrees.

Butter both sides of the flatbreads. Heat a grill or grill pan over medium heat. Add the flatbreads and cook, turning occasionally, until each side is browned and slightly crispy. Remove to a baking sheet and repeat with the remaining flatbreads.

Mix the pulled pork with some BBQ sauce, to taste.

Sprinkle some Monterey Jack and mozzarella on each flatbread. Divide the pulled pork evenly among the flatbread. Top each with some of the sliced red onion, followed by more of the cheeses.

Put the baking sheet in the oven and cook until the cheese melts, about 10 minutes. Remove from the oven, sprinkle each pizza with fresh cilantro and cut into pieces. Serve immediately.

Tuesday, May 10, 2016

May 10, 2016

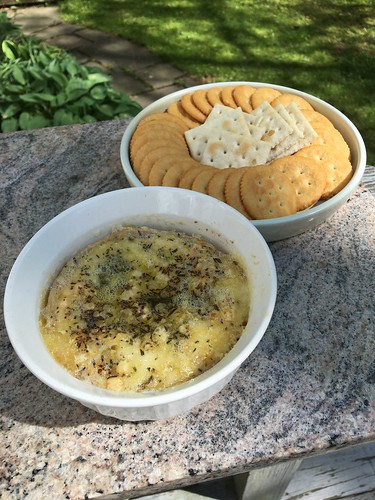
Baked Camembert

Do you remember when food blogs weren't nearly as plentiful as they are today? Back when I started blogging (August 2006!) the Internet was a much quieter place. One of the first food blogs I stumbled on was The Food Pornographer. She rarely posts recipes - her focus is on restaurants and photos of food - but she did post this one for Baked Camembert, which her extended family likes to make for special occasions.

Untitled

I made the same tweaks that they did - more garlic, no nuts or cranberries - and served it with crackers as our first course on Mother's Day.

Untitled

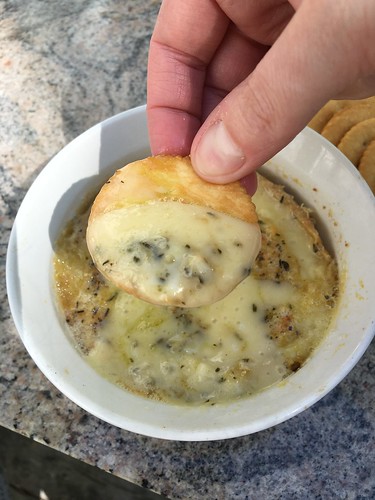
The smell of the garlic and rosemary baking in the oven was downright intoxicating. As soon as it came out of the oven we all descended like vultures and it was quickly devoured. Poor Steve is lactose intolerant so he took a Lactaid pill to enjoy the cheesy deliciousness. And then Katie proceeded to all but elbow him out of the way to get to the cheese. I had to restrain her so Daddy could have a few bites. That girl loves cheese, just like her parents.

Baked Camembert
Modified from Jamie Oliver

8oz Camembert cheese
2 cloves garlic, thinly sliced
1 teaspoon fresh rosemary leaves, minced
olive oil
crackers or bread for dipping

Preheat the oven to 350.

Cut off the rind from one side of the cheese. Put the cheese into an oven-safe ramekin. Press the sliced garlic into the top of the cheese, then sprinkle with the minced rosemary. Drizzle with a little olive oil. Bake in the preheated oven for 15 to 20 minutes, until the cheese is soft and gooey.

Allow to cool slightly, then serve with crackers or bread cubes for dipping.

Monday, May 9, 2016

May 09, 2016

Buttermilk Pie

Whenever I buy a quart of buttermilk to make my homemade chicken nuggets, I end up with quite a lot leftover. I've heard about powdered buttermilk, but I've never seen it in our supermarket. I've also tried a homemade version using milk and lemon juice, but I didn't think it tasted the same. I have an amazing recipe for IHOP pancakes that uses buttermilk, so we usually have pancakes a few weekends in a row. But this time I wanted to try something different, especially after my friend, Kylee, posted this recipe for Buttermilk Pie.

Untitled

From what I understand, this is a Southern staple, which means I'd never heard of it before Kylee posted the recipe. I went into this with zero expectations, just excited to try something new.

Untitled

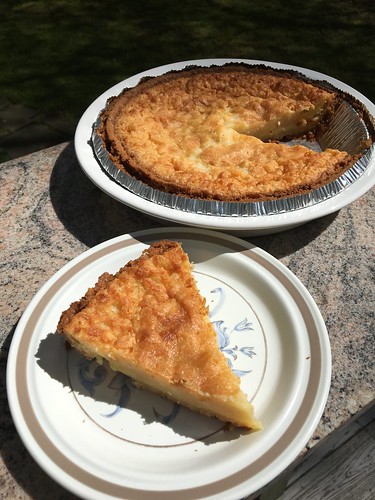
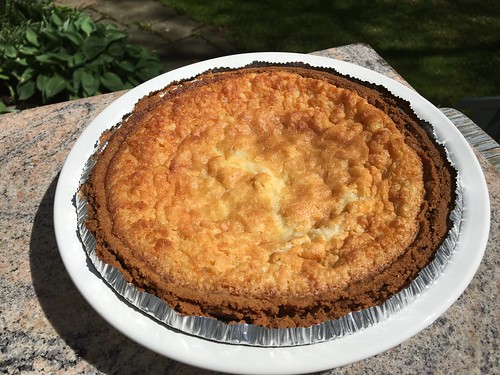
The recipe couldn't be easier - you just mix all the ingredients together and pour into a pie crust. This actually makes two pies, so it's perfect for a family get together or to bring into the office. We gave the second one away to a friend and he said the pie was gone the next morning.

The consistency is almost like a custard, but denser. It's impossible to describe - there's a hint of vanilla, a slight tang from the buttermilk and a mellow sweetness. I chose a ready-made shortbread pie crust because I didn't want to futz with making my own crust, but next time I might try to find a traditional pie crust instead. I did over bake my pies (the tops are very brown) so make sure you start with 50 minutes and check it often.

Buttermilk Pie
As seen on Kylee Cooks

6 eggs, beaten
1 cup low fat buttermilk
1 teaspoon vanilla
2 cups sugar
2 tablespoons cornstarch
1 teaspoon table salt
1 cup butter, melted and cooled
2 unbaked 9-inch pie crusts

Preheat the oven to 350.

In a large bowl, beat the eggs, buttermilk and vanilla together with a hand mixer for about 5 minutes. In a medium bowl, combine the sugar, cornstarch, salt and melted butter. Mix until well combined. Add the sugar mixture to the eggs and stir together, using a wooden spoon, until just combined.

Put the pie crusts (in pie plates) onto a large baking sheet. Divide the filling between the two crusts.

Bake for 50-55 minutes. You want the filling to be loose/wobbly (kind of like a thick custard) when you tap it, but not runny and the top to be lightly browned.

Let the pies cool completely. Serve at room temperature.

Friday, May 6, 2016

May 06, 2016

Banana Crumb Coffee Cake

What do you do when you have overripe bananas sitting on your counter? You bake with them, of course. As luck would have it, I saw this recipe for Banana Crumb Coffee Cake just as my bananas were starting to go from edible to mush. A quick check of the pantry and fridge showed I had all the ingredients on hand, so I set to baking.

Banana crumb coffee cake

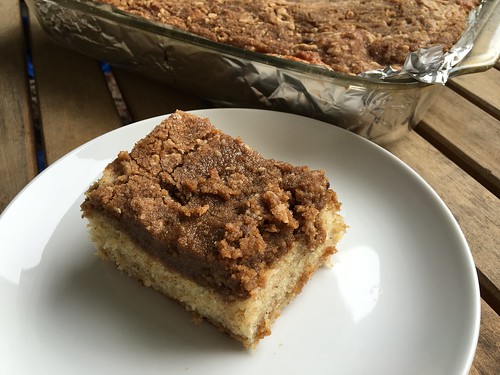
What a cake. I loved the subtle banana flavor mixed with the traditional coffee cake. This was moist and delicious, just perfect to have with your morning coffee or tea (I don't drink either, by the way) or as a sweet treat.

A few notes:

1. I don't like using my stand mixer so I used my hand mixer. It worked fine.
2. I don't own a pastry cutter, so I attempted to break up the butter for the streusel topping by hand. It didn't work. I ended up just mixing it together as best I could and sprinkling it on top of the cake. The butter melts as the cake cooks, so it didn't matter.
3. I tried to divide the batter in half, sprinkling some of the streusel in the middle before topping with the remaining batter. It didn't work. It also didn't matter.
4. Steve is lactose intolerant, so he asked me not to glaze the cake (since the glaze contains milk). And, let's be honest, this is sugary enough without adding more sugar on top. You won't miss it. We certainly didn't.
5. This makes a TON of food, which makes it great if you're having a party or know people who will take a few slices off your hands. We kept four pieces for ourselves and gave away the other 12 (3 sets of 4 pieces each). We had some very thankful friends and family, let me tell you.

Banana Crumb Coffee Cake
As seen on Tide and Thyme

2 cups flour
3 teaspoons baking powder
1 teaspoon salt
3 ripe bananas
1/2 cup butter, room temperature
2 cups granulated sugar
2 eggs
1 teaspoon vanilla extract
1 cup milk

For the streusel:
12 tablespoons (1 ½ sticks) cold butter, cubed
1 1/2 cups light brown sugar
1 1/2 cups flour
1 teaspoon cinnamon

For the glaze:
1 cup powdered sugar
1 teaspoon vanilla extract
1-2 tablespoons milk

Preheat oven to 350 degrees. Line a 9×13 baking dish with aluminum foil and spray with cooking spray. Set aside.

In a medium bowl whisk together flour, baking powder and salt.

In a stand mixer fitted with a paddle attachment (or a large bowl with a hand mixer), mash bananas until they become liquified. Mix in butter until combined and then mix in sugar, eggs, milk, and vanilla.

With mixer running on low, carefully add flour and mix until just combined.

Prepare streusel by combining all the ingredients in a medium bowl, cut the butter in with a pastry cutter until a coarse crumb forms.

Pour 1/2 of the batter into the prepared pan. Top with 1/3 of the crumb mixture. Cover the filling with the remaining batter and top with remaining crumb mixture. Don't worry if this doesn't work - it didn't for me and it still tasted great.

Bake for 50-55 minutes until the center is set and a toothpick comes out clean. Cool for at least 1 hour.

Mix together the glaze ingredients and drizzle over the cake before serving.

Monday, April 25, 2016

April 25, 2016

Shrimp Carbonara

We love a good carbonara around here. It's been a while since I made a new variation, so when I was reading a book that mentioned pasta carbonara I knew it was a sign. And thus, Shrimp Carbonara was born.

Shrimp carbonara

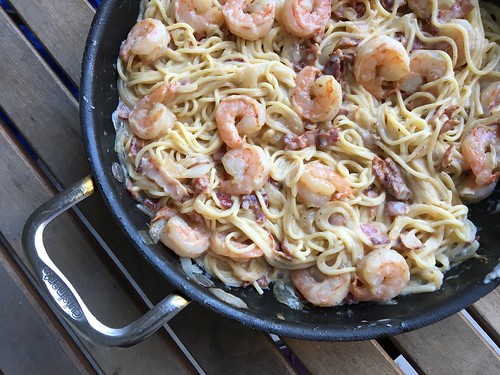
I'm not sure why it never occurred to me to make this before but now that I have, it will definitely become a regular thing. All I did was add shrimp to my standard carbonara recipe. I mean, what's not to love about shrimp cooked in bacon fat? Positively delicious.

Shrimp Carbonara
Based on Nigella Lawson's carbonara recipe

1 pound spaghetti
6 slices bacon, chopped into bite-size pieces
1 pound shrimp, any size you like, peeled and deveined
1 large onion, thinly sliced
1/4 cup dry vermouth (or white wine)
4 eggs
1 1/2 cups freshly grated Parmesan
1/4 cup half and half cream
Freshly ground black pepper
Freshly ground nutmeg

Cook pasta according to package directions. Drain and set aside.

In a large skillet that will fit the pasta later, cook the bacon until crispy but not crunchy. Remove with a slotted spoon, leaving the bacon grease in the pan.

While the bacon is cooking, pat the shrimp dry with paper towels and season with salt and pepper. After you've removed the bacon from the pan, add the shrimp in an even layer. Cook the shrimp until they're pink on both sides, about 2 minutes per side. Remove to the plate with the bacon.

Add the sliced onions to the pan and cook until softened and starting to caramelize, about 15 minutes. Add the vermouth and let it bubble so that, after a few minutes, you have a small amount of thick syrup left.

While the vermouth is reducing, beat together the eggs, Parmesan, cream, pepper and nutmeg in a bowl.

Once you have a nice syrup, add the pasta to the pan, tossing well to coat with the sauce. Take the pan off the heat (remove from the stove completely, don't just turn off the burner) and add the egg and cheese mixture, swiftly tossing everything with tongs to mix well. Add the bacon and shrimp and toss again. Taste and season with some more pepper and grated cheese, if desired.

Tuesday, April 19, 2016

April 19, 2016

Lemon Chicken Risotto

Last night was one of those nights where I felt frazzled by the thought of making dinner. I was making this recipe for Lemon Chicken Risotto, so I should have been walkin' on easy street. I love risotto and don't know why it has a reputation for being complicated. Maybe it's because a lot of recipes claim you have to stand at the stove, constantly stirring the rice, for upwards of 20 minutes. Let me tell you this - I've been making risotto for years and I never babysit it like that. True, I don't leave the kitchen so I can keep an eye on it, but I just make sure the pan never gets too dry and give everything a quick stir every few minutes.

Lemon chicken risotto

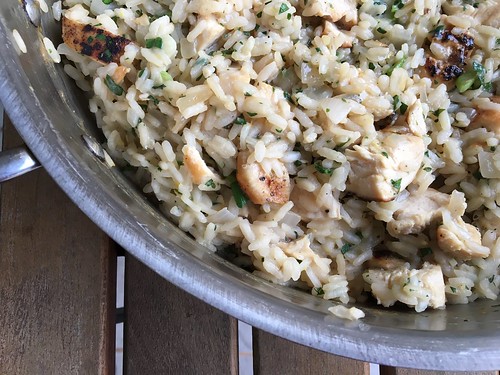
Anyway. I was frazzled, which meant by the time dinner was done I forgot all about photographing the gorgeous skillet full of deliciousness. As Steve and Katie made oohing and ahhing noises over the bright, lemony flavors and the perfectly cooked chicken, I realized my mistake. I quickly gathered the leftover risotto to one side of the pan and tried to strategically photograph it so it didn't look like 3/4 of the pan was missing. Ha!

Guys. This is some seriously good risotto. We all love risotto, but this was a real showstopper. The fresh herbs and the punch from the lemon were utter perfection. I don't have lemon pepper seasoning, but I did have some free samples of Mrs. Dash, so I used that last night. I should probably put lemon pepper seasoning on the shopping list, though, since I plan to make this one often.

Lemon Chicken Risotto
Slightly modified from How Sweet It Is

1 pound boneless, skinless chicken thighs or breasts
1/2 teaspoon salt
1/2 teaspoon garlic powder
1/2 teaspoon lemon pepper seasoning
2 tablespoons olive oil
5 to 6 cups low-sodium chicken stock
1/2 onion, finely diced
1 1/2 cups arborio rice
1/2 cup dry white wine
4 scallions, minced
1 tablespoon freshly grated lemon zest
1/4 cup freshly grated parmesan cheese
1 tablespoon fresh chopped basil
1 tablespoon fresh chopped parsley
salt and pepper for seasoning
1 tablespoon unsalted butter
lemon wedges for serving

Season the chicken with the salt, garlic powder and lemon pepper seasoning on both sides. Heat the oil in a large skillet over medium heat. Once hot, add the chicken. Cook on both sides until golden brown and cooked through, about 5 minutes per side. Remove the chicken to a plate. Once cool, cut into bite-size pieces.

Heat the stock over medium heat.

If the pan looks dry, add a little more oil, then add the onion. Cook until the onion is soft, about 5 minutes, then add the rice. Stir to toast the rice until it's somewhat translucent, about 2-3 minutes. Stir in the white wine and wait until the rice absorbs it before starting to add the stock, stirring until the rice absorbs the liquid like it did with the wine. Repeat this until all stock has been added and the rice is al dente. This process should take about 20 minutes.

Stir in the scallions, lemon zest, parmesan, basil and parsley. Taste and season with more salt or pepper, if needed. Add the tablespoon of butter along with the chicken, and toss to melt the butter. Serve immediately with a squeeze of fresh lemon juice on top of each serving.